
Charcoal Braai Guide: Tips, Flavor, Safety & FAQs
Features Buyers Should Look for in Charcoal Braais
Airflow Control:
Adjustable vents and dampers allow you to regulate oxygen flow, giving precise control over heat and cooking speed.
Heat Retention:
Thick, durable materials (like cast iron or heavy‑gauge steel) help retain heat for longer, ensuring consistent cooking.
Cooking Surface Size:
Choose a braai with enough grate space to suit your needs—compact for small families, larger for entertaining groups.
Durable Construction:
Rust‑resistant steel or enamel coatings extend the lifespan of your braai, even with frequent outdoor use.
Portability:
Lightweight, foldable, or wheeled designs make it easy to transport for camping, picnics, or garden gatherings.
Ash Management System:
Removable ash pans or trays simplify cleanup and reduce mess after cooking.
Grate Quality:
Cast iron or stainless-steel grates provide excellent sear marks, resist warping, and are easier to clean.
Safety Features:
Heat‑resistant handles, sturdy legs, and stable construction reduce the risk of accidents.
Extra Accessories:
Options like rotisserie attachments, warming racks, or smoker boxes add versatility to your cooking experience.
Accessories and Add‑Ons for Charcoal Braais
Chimney Starter:
A metal cylinder that helps ignite charcoal quickly and evenly without lighter fluid, ensuring a clean burn.
Ash Catcher / Removable Tray:
Collects ash beneath the braai for easy disposal and cleaner operation.
Adjustable Air Vents / Dampers:
Allow precise control of airflow, helping regulate cooking temperature and fuel efficiency.
Cooking Grates (Cast Iron or Stainless Steel):
Heavy‑duty grates that retain heat well, provide excellent sear marks, and resist warping.
Rotisserie Attachment:
A manual or motorized spit for slow‑roasting meats evenly over glowing coals.
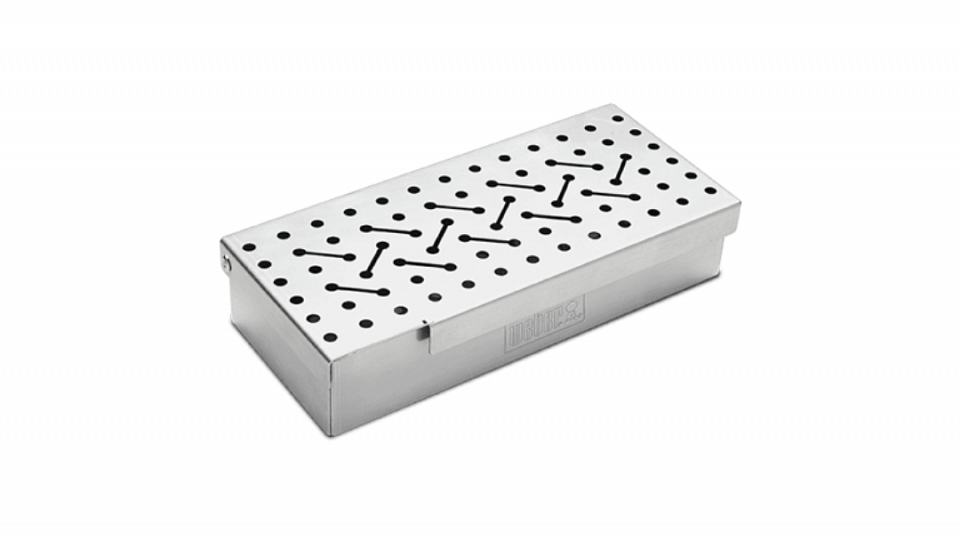
Smoker Box / Wood Chip Tray:
Adds smoky flavor by holding wood chips directly over the coals.
Heat Deflector / Plate:
Distributes heat evenly and reduces flare‑ups, ideal for indirect cooking.
Warming Rack:
A raised rack above the main grill surface to keep food warm or toast bread.
Fire Poker & Tongs:
Essential tools for safely moving coals and adjusting fuel during cooking.
Charcoal Basket / Divider:
Keeps charcoal organized and allows for dual‑zone cooking (direct vs. indirect heat).
Pizza Stone:
A ceramic stone that turns your charcoal braai into a pizza oven, delivering crisp bases.
Protective Cover:
Shields the braai from rain, dust, and UV damage, extending its lifespan.
Portable Wheels / Stands:
Add mobility, making it easier to move the braai around patios or campsites.
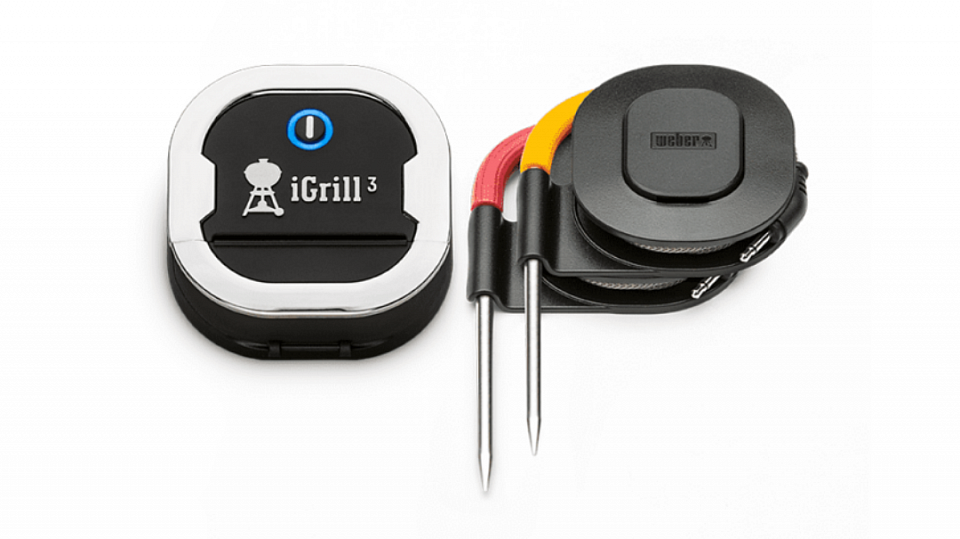
Thermometer (Built‑In or Digital):
Monitors cooking temperature for precision and food safety.

What is the best charcoal to use for a braai?
The optimal charcoal for a braai depends on whether you prioritize flavor, heat control, or burn duration. In South Africa, two primary types prevail: lump charcoal and briquettes.
Lump charcoal is produced from natural hardwood reduced to pure carbon. It ignites rapidly, burns hotter, and imparts the authentic smoky flavor favored by many braai aficionados. Due to its quick response to airflow, it is ideal for searing steaks or cooking foods requiring intense heat. However, lump charcoal burns faster and less evenly, necessitating additional fuel during extended cooking sessions. It is best suited for quick braais or when flavor is paramount.
Conversely, charcoal briquettes consist of compressed charcoal dust combined with binders. They provide a longer, more consistent burn than lump charcoal, making them suitable for slow cooking or larger gatherings where steady heat over several hours is essential. Briquettes are particularly effective for braaiing chicken, lamb, or roasts that demand even cooking. The compromise is a lower maximum heat compared to lump charcoal, and some lower-quality brands may contain fillers that impact flavor. Selecting premium briquettes ensures clean combustion and dependable performance.
Many South Africans prefer a blend of lump charcoal and briquettes. Lump charcoal is employed to ignite the fire quickly and deliver high heat for searing, while briquettes sustain a steady burn throughout the cooking process. This combined method optimizes flavor, heat, and burn time.
In conclusion, lump charcoal excels in flavor and high-heat cooking, whereas briquettes are ideal for prolonged, consistent burns. For most braai occasions, using both types together offers the advantages of rapid ignition, smoky flavor, and stable heat.
Is charcoal safe to store indoors or outdoors, and how should I store it?
Charcoal can be stored both indoors and outdoors; however, the critical consideration is to keep it dry, cool, and away from flammable materials. Moisture poses the greatest risk to charcoal, as it hinders ignition, generates excessive smoke, and may lead to mold growth. Proper storage ensures charcoal ignites easily, burns efficiently, and maintains its longevity.
When storing charcoal indoors, select a well-ventilated, dry location such as a garage, shed, or storeroom. It should be contained within a sealed container or a heavy-duty bag to prevent the spread of dust and odors. Avoid placing charcoal near heat sources, electrical appliances, or any flammable items, as charcoal remains combustible even when unlit.
For outdoor storage, charcoal must be shielded from rain, humidity, and direct contact with the ground. Optimal options include weatherproof bins, metal containers, or plastic storage boxes with secure lids. In coastal or humid environments, ambient moisture can penetrate packaging; therefore, double-bagging or using airtight containers is advisable to keep the charcoal dry and usable.
Additional safety precautions include never storing charcoal near petrol, paraffin, or other accelerants, as this significantly increases fire risk. Avoid exposure to direct sunlight, which can degrade packaging and allow moisture ingress. When purchasing charcoal in bulk, transfer it from paper bags into airtight containers to extend shelf life. Always store unused charcoal separately from ash or partially burned coals, since residual embers may reignite.
In conclusion, charcoal can be safely stored indoors or outdoors provided it remains dry, sealed, and isolated from heat sources or flammable substances. Proper storage guarantees dependable fuel for your next braai without concerns about dampness or safety hazards.

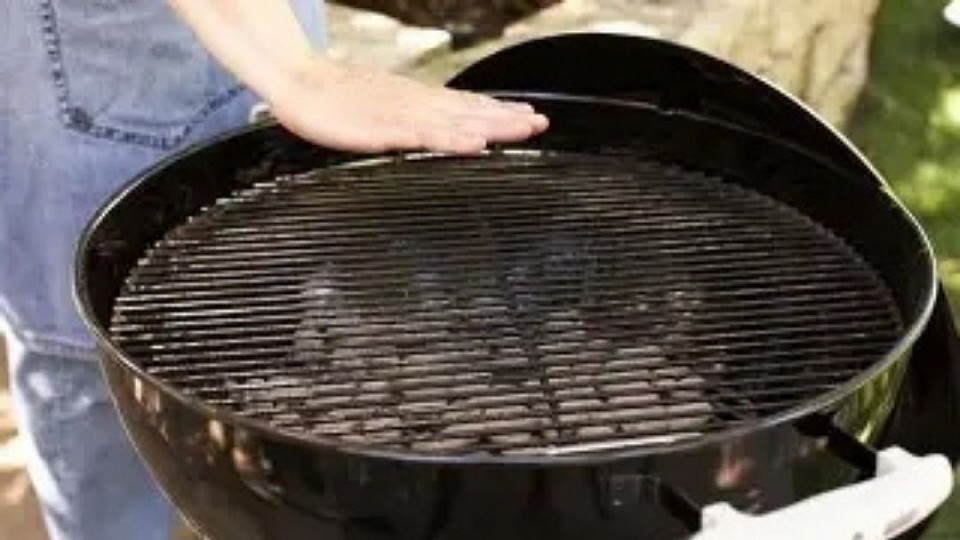
How do I clean and maintain a charcoal braai?
Proper cleaning and maintenance of a charcoal braai are crucial to ensure its safety, efficiency, and longevity. Unlike gas braais, charcoal models generate ash and soot that must be regularly removed to prevent rust, airflow obstruction, and undesirable flavors in food. An effective maintenance routine includes cleaning after each use and performing periodic deep maintenance.
Begin by removing ash and coal residue. Once the braai has fully cooled, clear out any remaining charcoal and ash from the firebox. Since ash retains moisture, which can lead to rust, it is advisable to empty it after every use. Utilize a metal scoop or ash pan, and avoid disposing of hot coals to prevent accidental reignition.
Next, attend to the cooking grates. Food debris and grease accumulate rapidly, so scrub the grates with a stiff wire brush or grill-safe scraper following each use. For a more thorough cleaning, soak the grates in warm, soapy water, rinse thoroughly, and dry completely before reinstalling. Cast iron grates should be lightly coated with cooking oil to inhibit rust, whereas stainless steel grates can be polished using a non-abrasive cleaner.
The interior surfaces of the braai also require regular attention. Wipe the inside of the lid and walls with a damp cloth to remove soot and carbon deposits. For persistent stains, apply a paste made from baking soda and water. Avoid harsh chemicals, as they may damage finishes or leave residues that affect the flavor of your food.
Routine maintenance inspections are equally important. Verify that air vents operate smoothly, as blocked vents restrict airflow and complicate heat control. Examine the braai body for any signs of rust or wear, and apply heat-resistant paint as needed. If your braai includes removable ash trays or baskets, clean them thoroughly and ensure they are securely fitted.
Finally, protect your braai through appropriate storage. Keep it covered when not in use, particularly in South Africa’s coastal regions where humidity and salt accelerate corrosion. Store the braai in a dry, sheltered location, and avoid exposure to rain.
In summary, maintaining a charcoal braai involves removing ash after each use, cleaning grates and interior surfaces, inspecting vents and components, and storing it properly. Adhering to this routine not only prolongs the lifespan of your braai but also guarantees safer and more flavorful cooking every time.
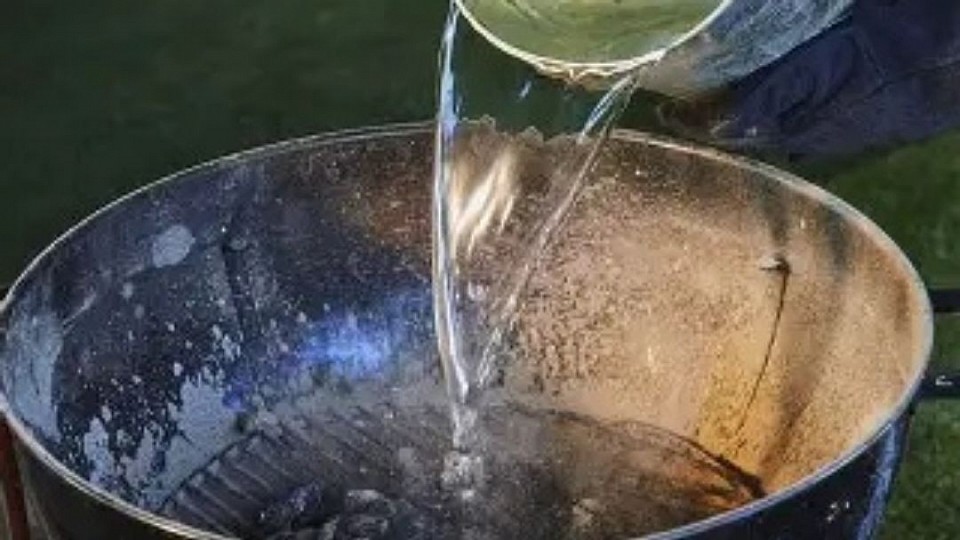
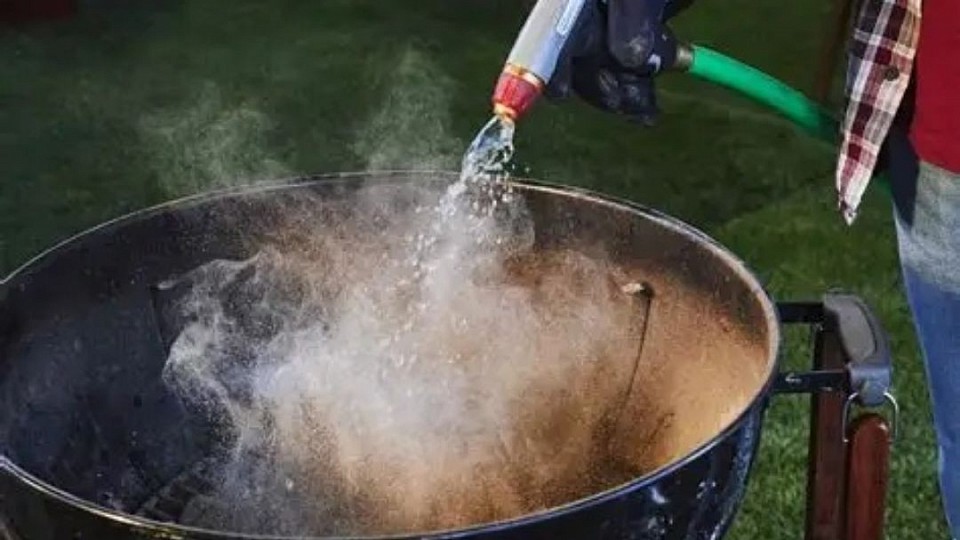
How do I clean up and dispose of charcoal ash safely after a braai?
Properly cleaning and disposing of charcoal ash after a braai is essential for ensuring fire safety and prolonging the lifespan of your braai. Ash can retain heat for several hours, sometimes overnight, so it must never be handled immediately after cooking. The initial step is to allow the charcoal and ash to cool thoroughly, typically requiring 12 to 24 hours. Attempting to clean while embers remain hot may result in accidental fires.
Once the ash has fully cooled, use metal tools such as a shovel or ash pan to remove it. Avoid plastic tools, as residual heat from hidden embers can melt them. Deposit the ash into a metal container with a secure, tight-fitting lid. This container should be stored outdoors, away from any flammable materials, until you are certain all embers are extinguished. Stirring the ash inside the container can help expose any remaining sparks, and adding a small amount of water ensures complete safety.
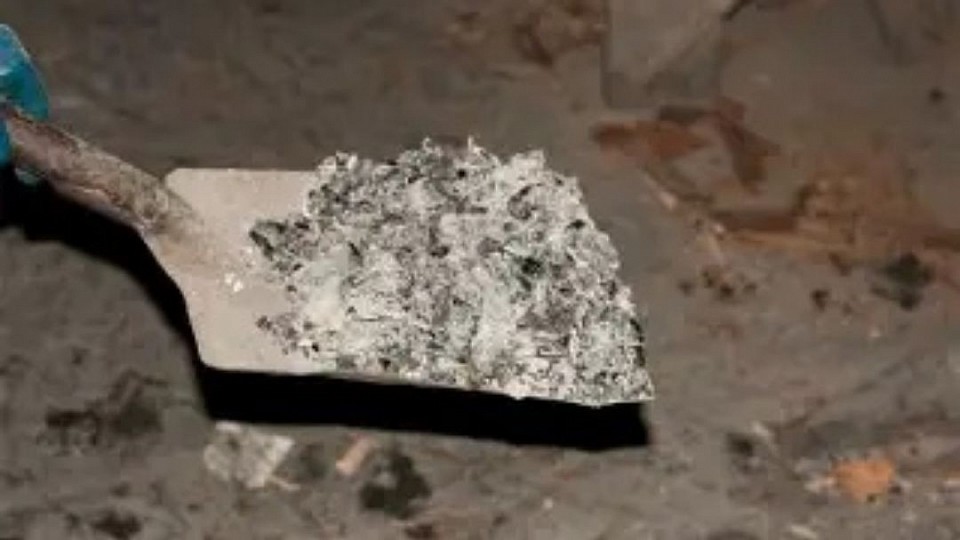
For disposal, cooled ash can be bagged and discarded with household waste. If you have used pure hardwood charcoal, the ash may be lightly sprinkled in the garden or compost, as it contributes potassium to the soil. However, use it sparingly to avoid altering soil pH levels. Briquette ash, which often contains additives, should be disposed of with general waste rather than applied to the garden.
Avoid washing ash down drains, as it can harden like cement and cause blockages. Always wear gloves when handling ash and minimize inhalation of ash dust. After cleaning, wipe down the braai’s firebox to prevent moisture-laden ash from promoting rust, and store unused charcoal in a dry environment to prevent dampness or mold growth.
In summary, safe ash disposal involves allowing it to cool completely, collecting it in a metal container, and disposing of it responsibly. This practice not only mitigates fire risks but also maintains your braai’s cleanliness, safety, and readiness for future use.
What size charcoal braai is best for my family or camping trips?
The ideal charcoal braai size for your family or camping excursions depends on the number of people you typically cook for and the level of portability required.
For small families or couples, a compact, portable braai is often the most practical choice. These models are lightweight, easy to transport, and well-suited for camping or picnics. They generally provide sufficient cooking space for 2–4 people, making them perfect for quick meals such as chops, boerewors, or chicken pieces. Their portability allows for effortless setup anywhere, and they consume less charcoal, which is advantageous when traveling.
For medium-sized families, a mid-range braai with a larger cooking grid is more appropriate. These units can comfortably accommodate cooking for 4–6 people simultaneously, offering ample space to prepare both meat and side dishes. They remain reasonably sized for home use or camping trips, provided there is adequate vehicle space. Many models feature adjustable grids or lids, facilitating precise heat control for various types of food.
For large families or frequent entertainers, a full-size charcoal braai is recommended. These braais offer expansive cooking surfaces capable of handling meals for 8–10 people or more. They are ideal for home use during gatherings but are less practical for camping due to their size and weight. Additionally, larger braais consume more charcoal, making them best suited for extended cooking sessions.
In summary, select a small portable braai for camping and small families, a medium-sized braai for everyday family use, and a large braai for hosting sizable gatherings at home. Aligning the braai size with your lifestyle ensures an optimal balance of convenience, cooking capacity, and portability.
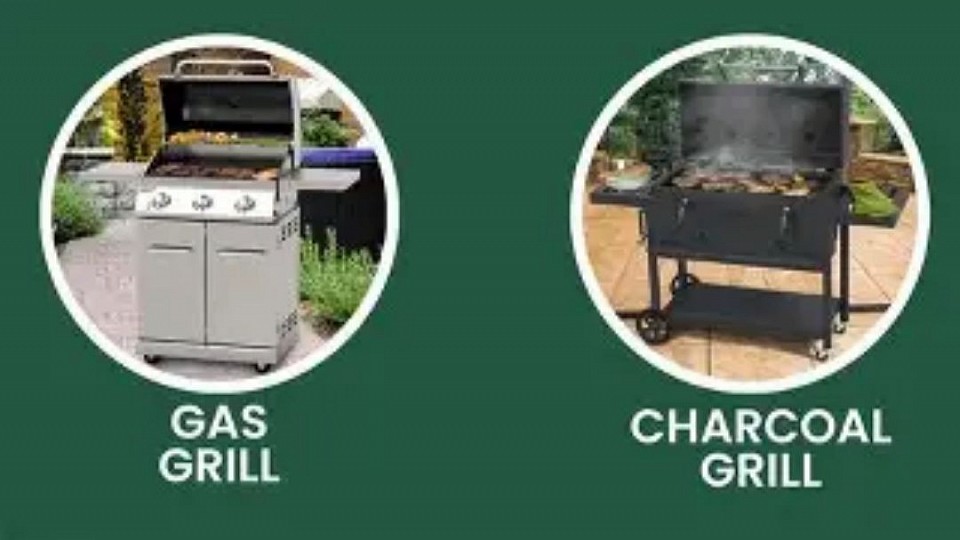
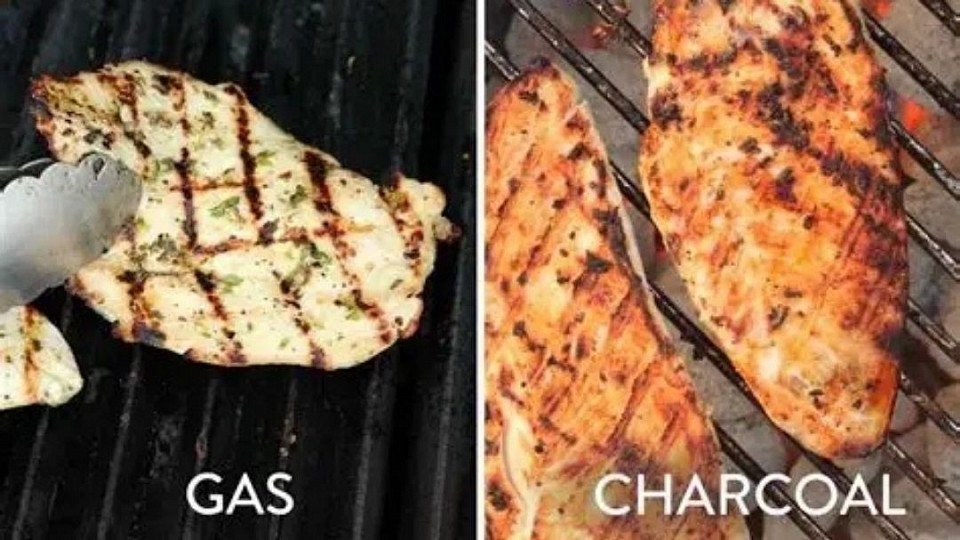
Which is better: charcoal braai or gas braai?
When choosing between a charcoal braai and a gas braai, the decision ultimately hinges on your priorities in the braai experience. A gas braai offers unparalleled convenience: it ignites instantly at the push of a button, reaches optimal cooking temperature within 10–15 minutes, and provides precise heat control through adjustable knobs. This makes it ideal for busy households or weeknight meals where speed and consistency are paramount. Additionally, cleanup is simplified, as there are no ashes to dispose of—only drip trays and grates require washing. However, gas braais may feel less authentic to traditionalists, as they lack the distinctive smoky flavor imparted by burning charcoal or wood.
Conversely, a charcoal braai requires more preparation time but delivers superior flavor and ambiance. Typically, it takes 20–40 minutes for the coals to reach the ideal cooking temperature, rewarding users with the rich, smoky taste that many South Africans regard as essential to an authentic braai. The process of lighting the fire, managing the coals, and cooking over natural heat forms a significant part of the cultural experience. Charcoal braais are generally more affordable initially and are available in numerous portable models, making them popular for camping and outdoor gatherings. The trade-off involves greater effort to regulate heat, increased skill to handle flare-ups, and more time required for cleanup.
In practice, many individuals opt to own both types. Gas braais are preferred for quick, everyday cooking when convenience is crucial, while charcoal braais are reserved for weekends, social events, or occasions where flavor and tradition are prioritized. Combo braais, which integrate both gas and charcoal options in a single unit, are also gaining popularity among those seeking versatility without compromise.
In summary, gas braais excel in speed, control, and convenience, whereas charcoal braais stand out for their flavor, tradition, and atmosphere. The optimal choice depends on your lifestyle: if you desire rapid meals with minimal effort, gas is the preferred option; if you seek authentic smoky flavor and the full braai ritual, charcoal is unmatched. Many South Africans find that owning both provides the best of both worlds.

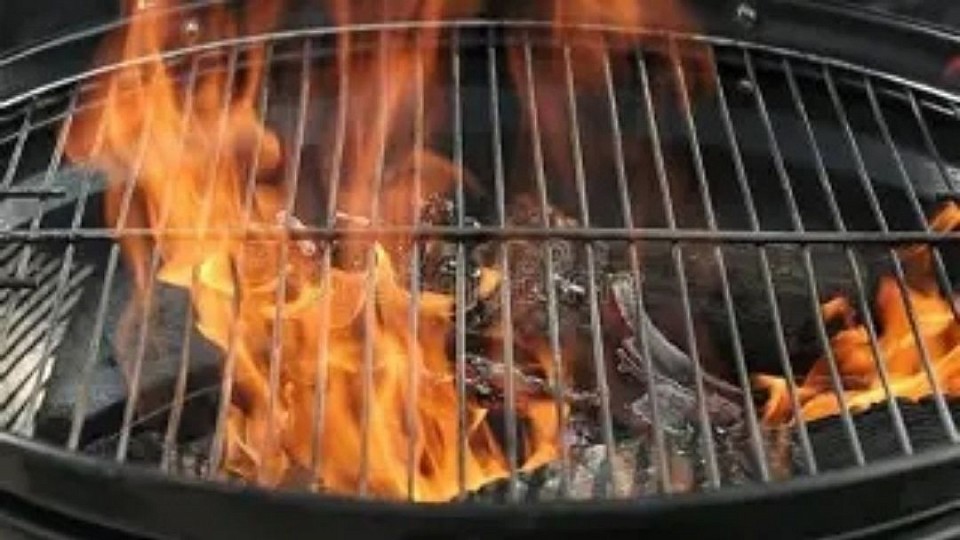
How do I light a charcoal braai quickly and safely?
Lighting a charcoal braai efficiently and safely requires the appropriate tools and the avoidance of hazardous shortcuts. The objective is to achieve evenly burning coals without flare-ups or the emission of harmful fumes.
The most reliable and expedient method is to utilize a chimney starter. This device is a metal cylinder equipped with ventilation holes that facilitate air circulation around the charcoal. Fill the top section with charcoal and place a few firelighters or crumpled newspaper beneath it. When ignited, the flames ascend through the chimney, evenly igniting the charcoal. Within 15–20 minutes, the coals will be glowing and ready to transfer to your braai. This technique eliminates the need for lighter fluid, which can impart chemical tastes to food and present fire hazards.
If a chimney starter is unavailable, natural firelighters or dry kindling wood may be used. Position them at the base of the braai, arrange the charcoal in a pyramid formation above, and ignite the firelighters. The pyramid shape promotes heat rising through the coals, accelerating ignition. Always use firelighters specifically designed for braais—never use petrol, paraffin, or other flammable liquids, as these are dangerous and may cause uncontrollable flames.
To expedite the process, ensure that your charcoal is dry and stored appropriately. Damp charcoal requires significantly more time to ignite and generates excessive smoke. Adequate airflow is also critical—keep the braai vents open during lighting to allow oxygen to fuel the fire. Once the coals are coated with a thin layer of white ash, they are ready for cooking.
In conclusion, the fastest and safest approach to lighting a charcoal braai involves using a chimney starter or natural firelighters, combined with proper airflow and dry charcoal. Avoid chemical accelerants, prioritize safety, and you will have evenly burning coals prepared for braaiing in under 20 minutes.
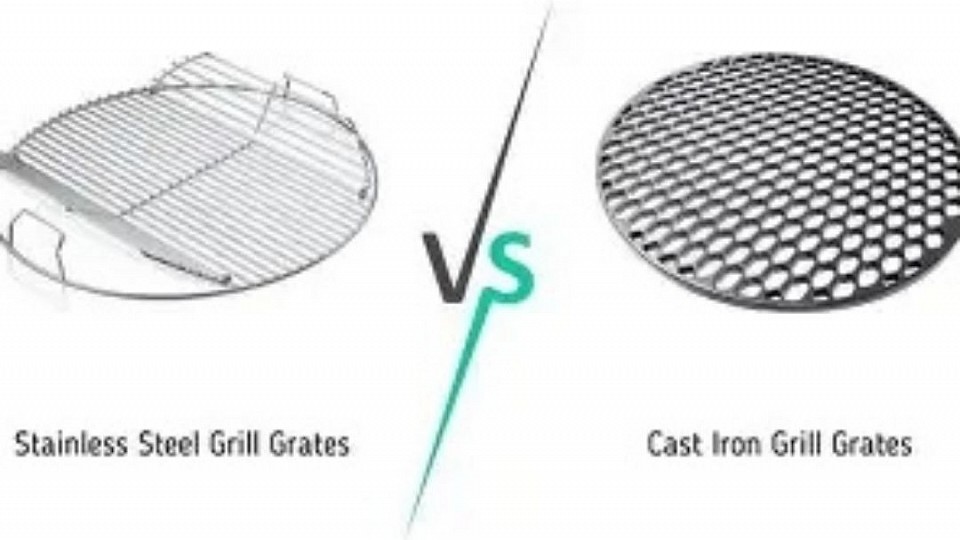
Cast Iron vs Stainless Steel in Braais
In braai construction, both cast iron and stainless steel present distinct advantages.
Cast iron is distinguished by its exceptional heat retention and even heat distribution, making it ideal for producing pronounced sear marks and maintaining consistent cooking temperatures over hot coals.
However, it is heavier, requires regular seasoning or protective coatings to prevent rust, and demands more rigorous maintenance.
In contrast, stainless steel is valued for its corrosion resistance, lighter weight, and high durability.
It heats up more quickly, is easier to clean, and withstands exposure to the elements, making it a practical choice for long-term outdoor use.
While cast iron appeals to traditionalists who prioritize superior heat performance and enhanced flavor, stainless steel is favored by those who seek low maintenance, hygiene, and modern design in their braai equipment.


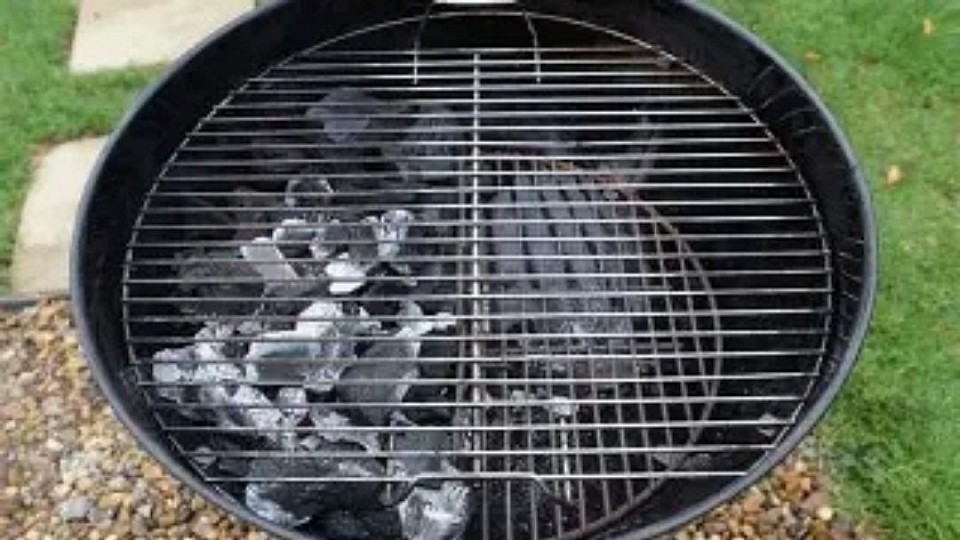
How long should I wait before cooking on charcoal?
When utilizing a charcoal braai, patience is essential to attain optimal cooking conditions. After igniting the charcoal, it is advisable to wait approximately 20 to 30 minutes before placing food on the grill. This interval allows the coals to burn down, stabilize, and reach the ideal temperature for cooking.
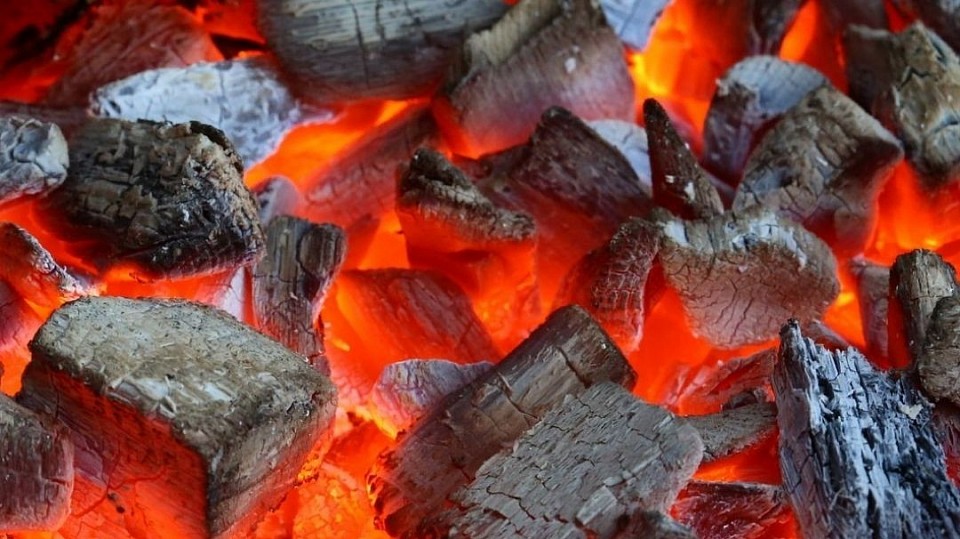
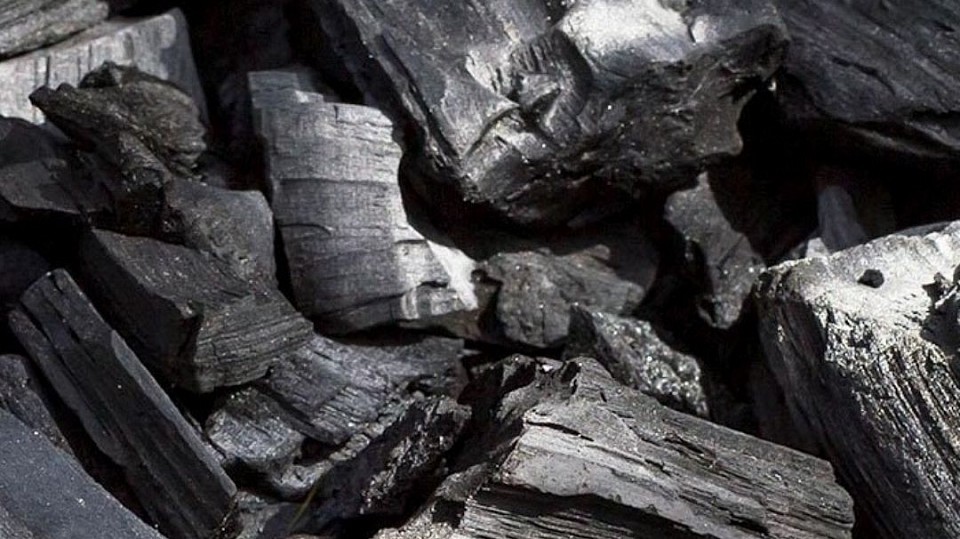
The most reliable indicator that your charcoal is ready is its appearance. Newly lit charcoal will be black with visible flames; however, this stage is excessively hot and uneven for cooking. Once the flames subside and the charcoal is coated with a thin layer of white-grey ash, it signifies that the coals are glowing steadily and generating consistent heat. At this stage, they are ideal for braaiing.
The precise waiting time varies depending on the type of charcoal used. Lump charcoal ignites more rapidly and may be ready in about 20 minutes, whereas briquettes require closer to 30 minutes due to their density and design for steady burning. Weather conditions also influence the process: wind can accelerate ignition, while damp or humid environments may delay it.
Cooking prematurely, while the coals are still flaming, often results in burnt exteriors and undercooked interiors. Allowing the coals to ash over ensures even heat distribution, minimizes flare-ups, and provides greater control over cooking times.
In conclusion, wait until your charcoal is glowing red and covered with a white-grey ash layer—typically 20 to 30 minutes after lighting—before commencing cooking. This straightforward step ensures enhanced flavor, safer cooking, and more consistent outcomes.
How do I control the heat on a charcoal braai?
Effective heat control on a charcoal braai hinges on managing airflow, coal arrangement, and timing. Unlike gas braais, which operate via a simple knob adjustment, charcoal requires a more nuanced approach—yet once perfected, it offers precise cooking control.
The primary factor is airflow. Oxygen fuels the fire; therefore, increasing air intake intensifies the coal’s heat. Most charcoal braais feature adjustable vents at the base and occasionally on the lid. Fully opening these vents maximizes heat, while partially closing them reduces it. For consistent cooking, keep the bottom vents open and regulate the top vents to fine-tune the temperature. Excessive vent closure will suffocate the fire, so maintaining balance is essential.
Coal placement is the next critical element. Arranging charcoal in specific patterns creates distinct heat zones. A two-zone configuration is highly versatile: concentrate coals on one side for direct, high-heat cooking—ideal for searing steaks—and leave the opposite side with fewer or no coals for indirect cooking, suitable for chicken, sausages, or roasts. This setup allows you to transfer food between zones depending on the required heat intensity. For uniform heat distribution, spread coals in a single layer, though this consumes more fuel.
Timing is equally important. Charcoal burns hottest when newly ignited and gradually cools as it accumulates ash. For high-heat cooking, begin when coals glow red with a thin white ash coating. For medium heat, allow the coals to ash over further. Introducing fresh charcoal during cooking can prolong burn time; however, new coals require 10–15 minutes to reach optimal cooking temperature, so plan accordingly.
Lastly, utilize tools and techniques to refine heat control. A lid traps heat, creating oven-like conditions, while adjusting the cooking grid’s height modifies heat intensity on the food. Adding wood chips to the coals imparts flavor without significantly altering temperature. Always keep long tongs accessible to swiftly move food between zones in case of flare-ups.
In conclusion, mastering heat control on a charcoal braai involves managing vents, arranging coals strategically, and timing your cooking phases. By honing these skills, you can effortlessly transition between searing, slow cooking, and smoking, achieving complete command over your braai experience.
How do I get that smoky flavor when braaing with charcoal?
Getting that rich smoky flavor when braaing with charcoal comes down to fuel choice, fire management, and cooking technique. Charcoal alone gives a clean heat, but with a few adjustments you can maximize the smokiness that makes a braai unforgettable.
The first step is to choose the right charcoal and wood combination. Lump charcoal burns hotter and cleaner, while briquettes provide steady heat. To boost flavor, add hardwood chunks or chips such as rooikrans, kameeldoring, oak, or hickory directly onto the coals. These woods release aromatic smoke that infuses meat with depth. Avoid softwoods like pine, which produce resinous smoke that can taste bitter.
Next, manage your fire and airflow. Smoky flavor develops best when food cooks over glowing coals with wood smoldering—not burning in open flames. Keep the lid closed as much as possible to trap smoke around the food, and adjust vents to control airflow. Too much oxygen burns wood too quickly, producing less smoke; too little oxygen smothers the fire. Aim for a steady smolder that produces thin, blue smoke rather than thick, white smoke, which can leave food tasting acrid.
Cooking technique also matters. Place meat over indirect heat zones and let smoke circulate around it. This works especially well for chicken, lamb, or larger cuts that need longer cooking times. For steaks or chops, sear them quickly over direct heat, then move them to the cooler side with wood chips smoldering nearby to absorb smoky flavor without overcooking.
Finally, experiment with flavor boosters. Soaking wood chips in water, beer, or wine before adding them to the coals can extend smoldering time and add subtle notes. Marinades and rubs with sugar or spices also react with smoke to create a caramelized crust that enhances flavor.
In summary, the secret to smoky flavor is to combine charcoal with hardwood, manage airflow for steady smoldering, cook with indirect heat, and trap smoke around the food. Done right, you’ll achieve that deep, authentic taste that defines a true South African braai.
