Klein Karoo Grow Kits - Blog Page
Why Are My Atlantic Giant Pumpkins Cracking?
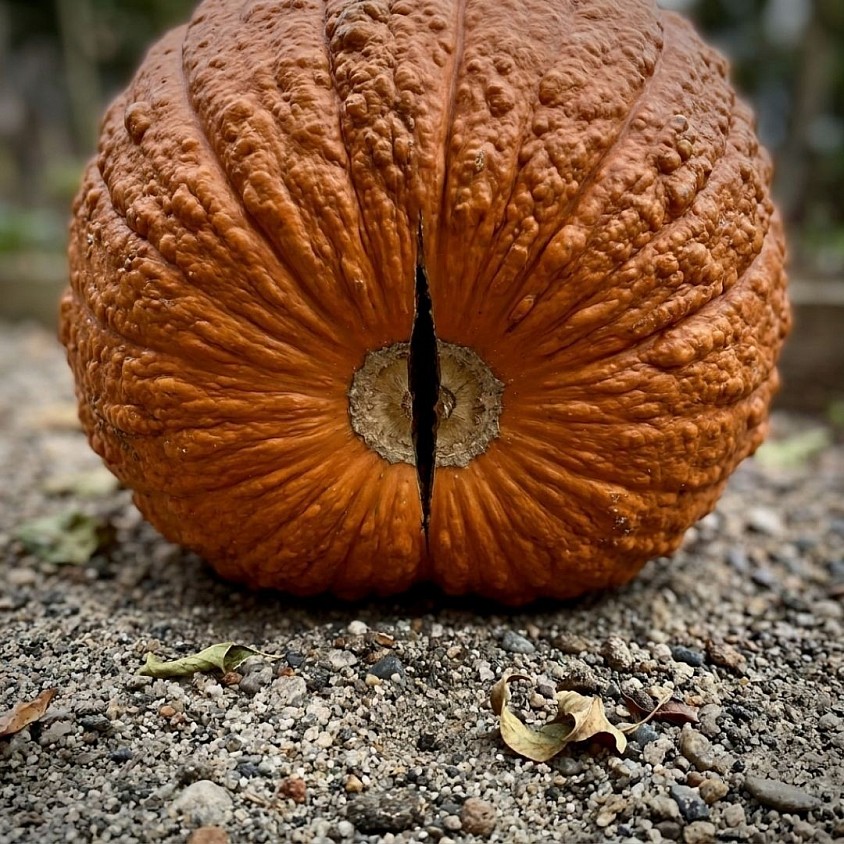
Growing Atlantic Giant pumpkins (Cucurbita maxima) is a high-stakes balance between maximizing growth rates and structural integrity. Under optimal conditions, these massive fruits can gain up to 15 to 20 kilograms in a single 24-hour period. However, this explosive surge in size pushes the pumpkin's outer rind to its absolute physical limits. Cracking is one of the most frustrating challenges growers face, typically resulting from sudden surges in internal water pressure, environmental stress, physical tension along the vine, or rind weaknesses.
🎃 Uneven Watering and Fluctuations in Soil Moisture
The single most common cause of fruit splitting is an abrupt shift in soil moisture levels. When an Atlantic Giant vine experiences a period of drought or light watering followed by a heavy soaking—whether from excessive irrigation or a torrential rainstorm—the root system rapidly absorbs vast quantities of water.
This massive influx of water rushes directly into the expanding cells of the pumpkin's inner pulp. The internal tissue expands much faster than the outer rind can stretch or produce new cells, building up immense hydrostatic pressure inside the fruit. Eventually, the tension exceeds the structural strength of the skin, causing the rind to burst open along its weakest structural points.
🎃 Temperature Swings and Sun Damage (Sunscald)
Temperature and direct solar radiation significantly influence the elasticity and flexibility of the pumpkin skin.
Sunscald and Hardening: Direct exposure to harsh afternoon sunlight bakes the exposed surfaces of the fruit. The UV rays and heat cause the outer cell layers to dry out, lose elasticity, and harden prematurely. When the interior of the pumpkin continues to expand rapidly, this hardened, rigid skin cannot stretch to accommodate the growth, resulting in severe surface or deep structural cracks.
Rapid Thermal Expansion: Significant differences between daytime high temperatures and cool night temperatures cause the expanding fruit tissues to contract and expand unevenly, placing stress on the outer shell.
🎃 High Nitrogen Fertilization and Explosive Growth Rates
While heavy feeding is required to produce giant specimens, oversupplying nitrogen during peak fruit expansion is a primary catalyst for splitting.
High nitrogen levels stimulate rapid cellular elongation rather than strong, dense cell wall construction. When a pumpkin grows too fast due to excessive nitrogen, the cell walls within the rind become thin, soft, and structurally weak. Without adequate calcium and potassium to reinforce cellular strength, the soft, rapidly expanding rind succumbs to internal growth pressure, splitting wide open.
🎃 Mechanical Tension and Stem/Blossom-End Binding
Physical stress between the main vine, the fruit stem (pedicel), and the ground frequently causes stem-end cracking and blossom-end splits.
As the pumpkin swells, it grows both outward and upward, increasing in height and circumference. If the main vine is rooted firmly into the ground via secondary roots close to the fruit stem, it holds the stem at a rigid, fixed angle. As the pumpkin grows larger, it exerts tremendous physical leverage against its own stem connection. If the vine does not have room to lift and flex naturally, this mechanical tension tears open the attachment point where the stem meets the fruit top or splits the blossom end underneath.
🎃 Micronutrient Deficiencies (Calcium and Boron)
Structural strength at a cellular level relies heavily on specific soil nutrients:
Calcium Deficiency: Calcium is the key structural component of plant cell walls (forming calcium pectate). If calcium transport to the fruit is restricted—often caused by irregular watering or high heat—new rind cells are structurally compromised and burst easily under pressure.
Boron Deficiency: Boron works synergistically with calcium in cell wall synthesis and membrane integrity. A lack of boron leads to brittle, inflexible rind tissues prone to stress-fracturing.
🎃 Prevention and Repair Strategies
Preventing cracks requires consistent management throughout the rapid growth phase, alongside quick action if minor surface checks appear:
Maintain Consistent Drip Irrigation: Use drip irrigation to keep soil moisture levels completely uniform. Never allow the soil around the vine to dry out significantly before applying large volumes of water.
Shade the Developing Fruit: Erect a canopy, shade cloth, or light sheet over the pumpkin to protect the entire rind from direct sunlight, keeping the skin cool, supple, and elastic.
Train and Prune Vine Connections: As the young fruit develops, ensure the main vine forms a wide 90-degree angle with the fruit stem. Carefully clip away any secondary roots growing from the vine within one to two meters of the stem to give the vine freedom to lift as the pumpkin grows.
Balance Nutrition: Avoid high-nitrogen fertilizers once fruit set is complete. Shift focus toward balanced potassium, phosphorus, calcium, and boron applications to build dense, flexible cell walls.
Managing Minor Surface Cracks: If a small, shallow hairline crack appears on the surface without penetrating into the inner cavity, keep the area completely dry. Treat the wound with sulfur dust or an approved fungicide, and run a small fan over the area to encourage the rind to callous over.
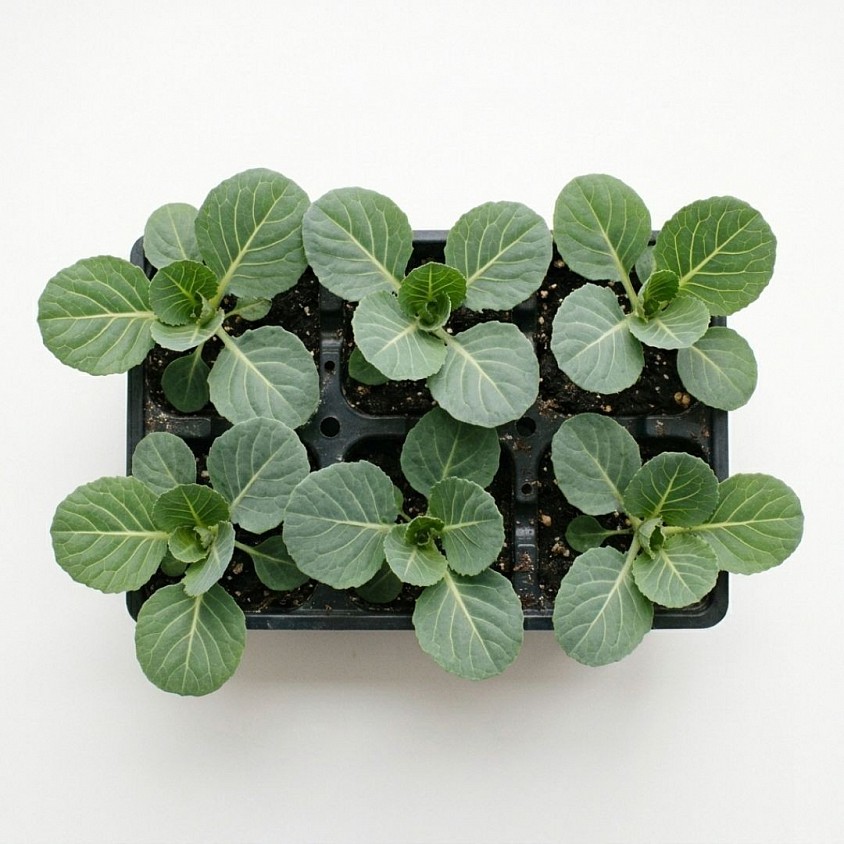
When Is the Best Time of Year to Plant Giant Drumhead Cabbage in South Africa?
Growing the impressive Giant Drumhead Cabbage (Brassica oleracea var. capitata) in South Africa requires understanding regional climate patterns and seasonal shifts. Unlike fast-maturing standard cabbage varieties, Giant Drumhead is an heirloom heavy-grower that requires four to five months of consistent growth to form its massive, densely packed heads. Because brassicas thrive in cool weather and tend to bolt or suffer severe pest pressure in high heat, timing your planting window correctly is essential to securing a successful harvest.
🥬 Understanding the Optimal Growing Window
Giant Drumhead cabbages perform best when they reach maturity during cool, mild weather. High summer temperatures cause the plants to stress, leading to loose head formation, bitter leaves, or premature seed stalk development (bolting). Furthermore, young seedlings established in late summer or autumn avoid the intense heat waves and heavy pest populations—such as aphids, bagrada bugs, and diamondback moth larvae—that dominate the high summer months across South Africa.
For most regions in South Africa, late summer to autumn (February through April) is the prime window to sow seeds and transplant seedlings. This allows the plants to establish strong root systems and expansive leaf canopies while temperatures are mild, heading up during the cool autumn and winter months.
🥬 Planting Timelines by South African Region
Because South Africa encompasses diverse climatic zones—ranging from frost-prone highveld regions to frost-free coastal belts—adjusting your planting schedule to your specific local environment ensures optimal results.
Interior Highveld and Frost-Prone Areas (Gauteng, Free State, Mpumalanga Highveld, and Inland Eastern Cape):
Sow seeds in trays from late January through February, and transplant seedlings into garden beds by March. This ensures the plants build significant leaf volume before severe winter frosts arrive in June and July. Giant Drumhead cabbage is frost-tolerant once established and will happily mature through the winter months, ready for harvesting between June and August.
Cool Maritime and Winter-Rainfall Regions (Western Cape and Garden Route):
In the Western Cape, where winter brings rain and mild temperatures, sowing can occur from February through April. Transplanting seedlings into autumn allows the crop to grow steadily through the rainy winter, maturing into early spring (July to September) without the risk of heat stress.
Subtropical and Frost-Free Coastal Belts (KwaZulu-Natal Coast, Lowveld, and Limpopo):
In warmer, frost-free regions, winter provides the only sufficiently cool window for growing giant brassicas. Sow seeds from March through May to transplant in autumn. This positions the crop to mature during the coolest months of the year (June to August), avoiding the extreme summer humidity, fungal rots, and severe insect activity typical of subtropical summers.
🥬 Seed Sowing vs. Transplanting Timelines
Because Giant Drumhead seeds take roughly 7 to 14 days to germinate and another 4 to 6 weeks to reach sturdy transplant size, factor nursery care into your seasonal planning:
1. Seed Tray Phase (Weeks 1 to 5): Sow seeds in deep seedling trays using a high-quality seedling mix in late summer. Keep the soil consistently moist and shaded from harsh afternoon sun.
2. Transplanting Phase (Week 6): Harden off seedlings by exposing them gradually to full sunlight over a week before moving them into deeply cultivated, fertile soil enriched with compost and well-rotted manure.
3. Maturity Phase (120 to 150 Days Post-Transplant): Maintain steady drip irrigation and balanced nutrition throughout autumn and winter. Your Giant Drumhead cabbages will be ready for harvest when the central heads feel rock-solid under firm hand pressure.
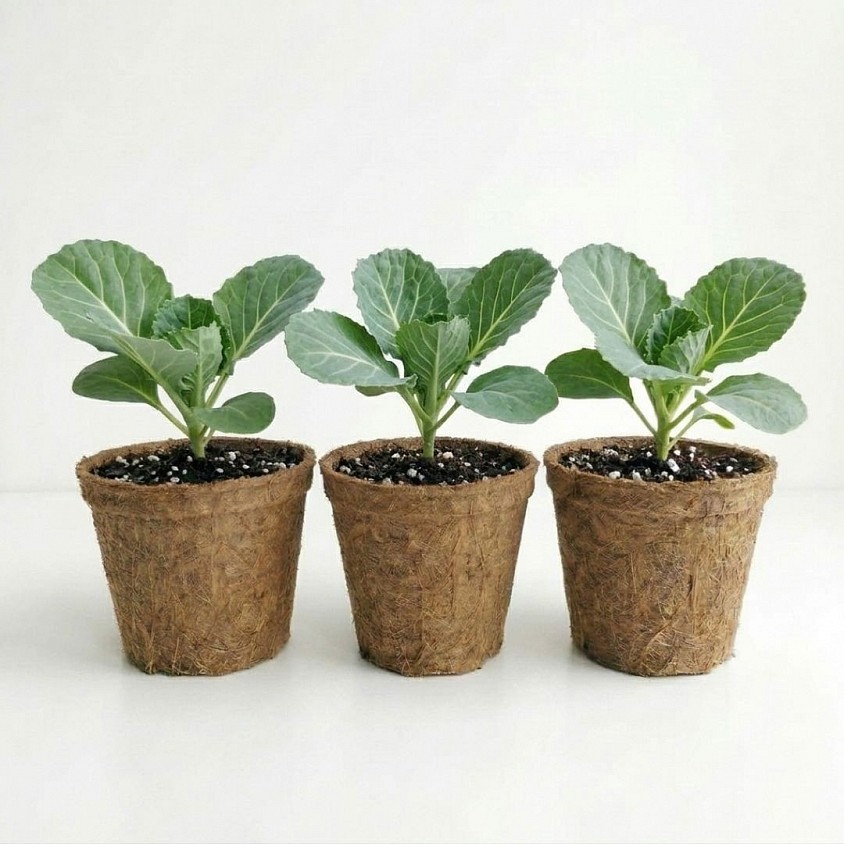
Why Are My Flowers Not Producing Atlantic Giant Pumpkins?
Cultivating Atlantic Giant pumpkins (Cucurbita maxima) is an exciting challenge, but few things are more frustrating than watching your vine produce dozens of vibrant yellow flowers without setting a single fruit. Because Atlantic Giants have immense energy demands and strict biological requirements, fruit set relies on precise pollination, correct vine management, and optimal weather conditions. Understanding how pumpkin flowers work and why they fail to produce fruit is the first step toward harvesting a giant.
🎃 Understanding Male vs. Female Flowers
The most common reason a pumpkin plant isn't producing fruit is simply a lack of pollinated female flowers. Atlantic Giant pumpkin vines are monoecious, meaning they produce separate male and female flowers on the same plant.
Male Flowers: These appear first on long, thin, upright stems. They produce the pollen necessary for fertilization but will never produce a pumpkin. In the early weeks of flowering, a vine may produce dozens of male blossoms before a single female flower appears.
Female Flowers: Female blossoms grow much closer to the main vine on shorter stems. They are easily identified by a distinct, marble-to-sized baby pumpkin (the ovary) located directly behind the yellow petals.
The Solution: Examine your plant carefully. If you only see long-stemmed blossoms without small embryonic pumpkins behind the petals, your vine is simply in its early male-flowering phase. Female flowers will begin appearing as the vine matures and gains vigor.
🎃 Pollination Failure and Inadequate Bee Activity
Even when female flowers open, they must be successfully pollinated within a very narrow timeframe. A female Atlantic Giant blossom is typically receptive to pollen for only 4 to 6 hours on the morning it opens.
To achieve a solid fruit set, thousands of pollen grains from male flowers must be transferred to the lobes of the female stigma. If honeybees, bumblebees, or squash bees are scarce in your garden—or if rain, heavy fog, or cold morning air keeps them inactive—the unpollinated female flower will turn yellow, shrivel, and drop off within a few days.
Manual Intervention (Hand-Pollination): Experienced growers rarely rely on insects alone. On the evening before a female flower opens (indicated by a yellowing tip on the swollen bud), tie the petals loosely shut with a soft twist-tie to keep insects out. Do the same for three or four mature male buds. Early the next morning, remove the male petals to expose the pollen-covered anthers and gently paint the stigma of the female flower. Tie the female flower closed again for 24 hours to protect the pollination zone.
🎃 High Temperatures and Pollen Sterility
Temperature plays a major role in whether a pollinated flower actually sets fruit. Atlantic Giant pumpkins thrive in warm weather, but extreme heat disrupts their reproductive physiology.
Pollen Sterility: When daytime temperatures exceed 90°F (32°C), or night temperatures remain consistently above 75°F (24°C), pumpkin pollen can become sterile or dry out before fertilization is complete.
Heat Stress Abortions: High temperatures force the plant to focus its energy on survival and cooling through transpiration rather than fruit production. Even if a female flower is hand-pollinated during a heatwave, the plant may abort the young pumpkin shortly after pollination.
Mitigation: Erect temporary shade cloth over the vine tip and developing flower buds during extreme heat waves to keep temperatures manageable.
🎃 Plant Immaturity and Energy Balance
Atlantic Giant pumpkin vines require a massive leafy canopy to generate enough photosynthetic energy to support a rapidly growing fruit.
If a female flower opens on a young vine that is only 5 to 8 feet long, the plant often lacks the sugar-producing capacity needed to sustain the fruit. Recognizing this deficiency, the vine naturally aborts the young pumpkin so it can continue investing energy into vine and leaf growth. Most growers wait to set a pumpkin until the main vine is at least 12 to 15 feet long with a lush, healthy leaf canopy.
🎃 Excessive Nitrogen and Nutrient Imbalances
Fertilizer choices directly influence whether an Atlantic Giant vine favors vegetative growth or fruit production.
Too Much Nitrogen: High-nitrogen fertilizers encourage rapid, lush growth of leaves, stems, and runners at the expense of fruit set. Excess nitrogen signals to the plant to stay in a vegetative phase, often causing it to drop female flowers or fail to produce them entirely.
Lack of Phosphorus and Potassium: Phosphorus supports early root and flower development, while potassium is essential for fruit growth and cellular strength.
Best Practice: As female flowers begin to appear, transition from high-nitrogen vegetative feeds to balanced or phosphorus-rich formulations to support floral health and fruit set.
🎃 Overwatering and Poor Root Health
Inconsistent soil moisture creates root stress that prompts the vine to shed reproductive structures. Saturated soils reduce oxygen levels in the root zone, impairing the plant's ability to absorb water and essential micronutrients like calcium and boron—both of which are critical for pollen tube growth and cell structure in developing fruit. Maintain deep, consistent irrigation at the root zone rather than overhead watering, allowing the top layer of soil to dry slightly between waterings.
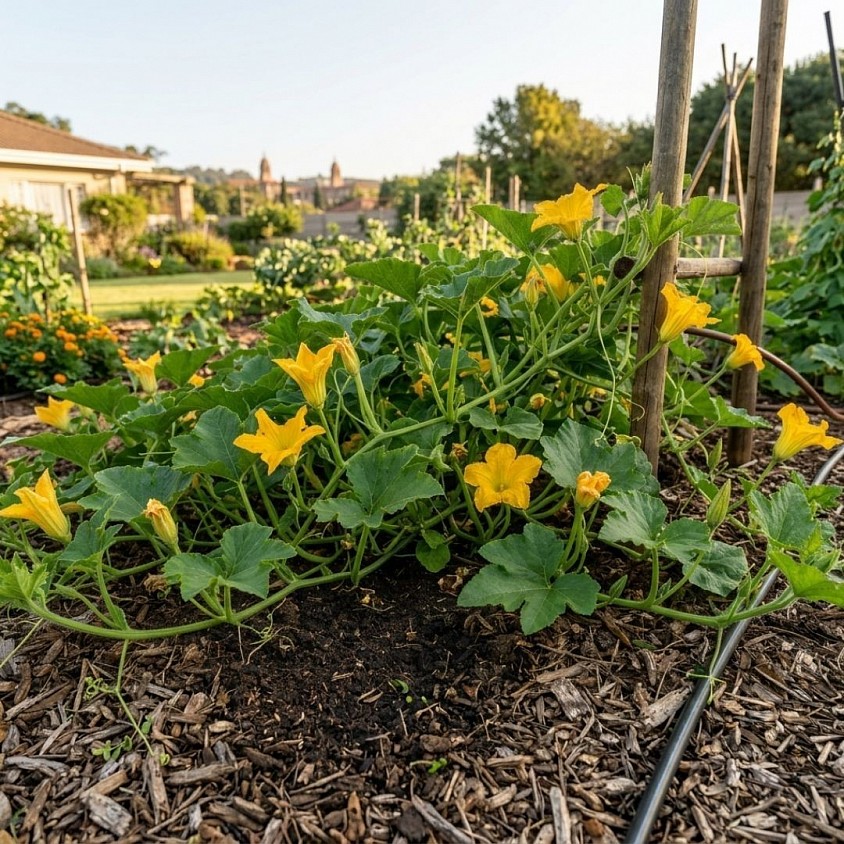
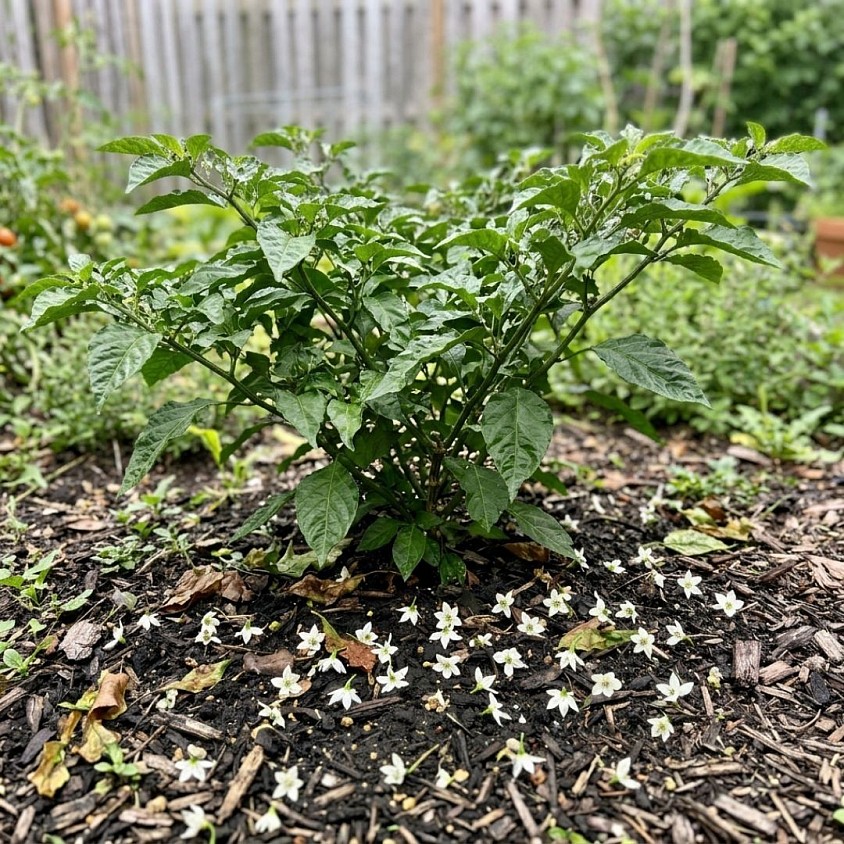
Why Are My Carolina Reaper Flowers Falling Off?
Cultivating the Carolina Reaper (Capsicum chinense)—officially recognized as one of the world's hottest chili peppers—requires patience and attention to detail. One of the most frustrating challenges growers face is blossom drop, where healthy-looking flowers yellow at the stem and fall off the plant without forming fruit. Flower drop is a protective stress response: the plant sheds blooms to conserve energy when environmental conditions or internal balances are not ideal for successful pollination and fruit development.
🌶️ Temperature Extremes and Environmental Stress
Temperature plays the single most critical role in Carolina Reaper pollination. Nightshade crops in the Capsicum chinense species are particularly sensitive to temperature fluctuations during their flowering phase.
High Heat Stress: When daytime temperatures consistently exceed 90°F to 95°F (32°C–35°C), or night temperatures remain above 75°F (24°C), the pollen grains become sterile or dry out before fertilization can occur. Unable to set seed, the plant aborts the unfertilized flowers.
Cold Temperatures: Conversely, if night temperatures drop below 60°F (15°C), plant metabolism slows significantly, causing pollen tube growth to stall and leading to premature blossom drop.
🌶️ Humidity and Pollination Failure
Carolina Reaper flowers are self-pollinating, meaning each bloom contains both male (anthers) and female (stigma) structures. However, successful pollination relies on ideal humidity levels to transfer pollen effectively.
Low Humidity (Dry Air): In dry conditions (below 40% relative humidity), pollen becomes dry and powdery, failing to stick to the moist stigma structure required for fertilization.
High Humidity (Wet Air): In overly humid environments (above 70–80% relative humidity), pollen grains clump together due to excess moisture, preventing them from shedding cleanly off the anthers.
🌶️ Improper Watering Practices
Inconsistent soil moisture directly causes vascular stress within the plant, interrupting nutrient transport to delicate flower stems (pedicels).
Overwatering: Saturated soil starves the root system of oxygen, leading to root stress or rot. When roots fail, the plant cannot support new growth and purges its flowers first.
Underwatering: Allowing the soil to dry out to the point where the leaves wilt causes immediate moisture loss in flower stalks. The plant sheds blooms to protect its main stem and leaves from dehydration.
🌶️ Nutrient Imbalances (Excess Nitrogen and Low Calcium/Phosphorus)
Fertilization mistakes are a leading cause of blossom drop in super-hot peppers.
Too Much Nitrogen: High-nitrogen fertilizers encourage rapid, lush green vegetative growth (leaves and branches) at the expense of reproductive health. Excess nitrogen causes the plant to bypass fruit set, shedding its flowers in favor of growing more foliage.
Phosphorus and Potassium Deficiencies: Phosphorus and potassium are vital for floral development, root strength, and seed formation. A lack of these macro-nutrients impairs flower vitality.
Calcium and Trace Element Deficiencies: Calcium is essential for cell wall structure in developing stems. Micronutrients like boron also play a key role in pollen viability and pollen tube growth.
🌶️ Lack of Air Movement or Pollinators
Although pepper flowers are self-fertile, they still require mild vibration—from wind, buzzing insects, or manual movement—to shake pollen loose from the anthers onto the stigma.
Plants grown indoors, in closed greenhouses, or in sheltered pockets with stagnant air often drop unpollinated flowers simply because the pollen was never disturbed. Gently shaking the main stem daily or placing an oscillating fan nearby easily resolves this issue.
🌶️ Practical Steps to Prevent Blossom Drop
To encourage high fruit set on your Carolina Reaper plants, apply these proven cultural management steps:
Regulate Temperature and Shade: During extreme summer heat waves, provide 30% shade cloth over your plants during peak afternoon sun to reduce thermal stress.
Optimize Nutrient Applications: Switch from high-nitrogen vegetative fertilizers to a balanced bloom formulation rich in phosphorus, potassium, and calcium once flower buds begin forming.
Maintain Consistent Soil Moisture: Water deeply and consistently, allowing only the top inch of soil to dry out between waterings. Use mulch to regulate soil moisture and root zone temperature.
Assist Pollination: Gently shake the pepper plant's main stem or use a small artist paintbrush to manually transfer pollen between open blooms every afternoon.
What Common Pests Can Affect Ghost Pepper Plants in South Africa?
Growing Ghost Peppers (Capsicum chinense), also known as Bhut Jolokia, has become increasingly popular across South Africa, from the hot, humid summers of KwaZulu-Natal and the Lowveld to the highveld climate of Gauteng. While these super-hot peppers thrive in our warm weather and long sunny days, their lush foliage, delicate flowers, and developing pods remain attractive targets for local agricultural and garden pests. Identifying these common insects early and applying effective, locally suited management techniques is essential for a abundant harvest.
🌶️ Aphids (Plant Luise)
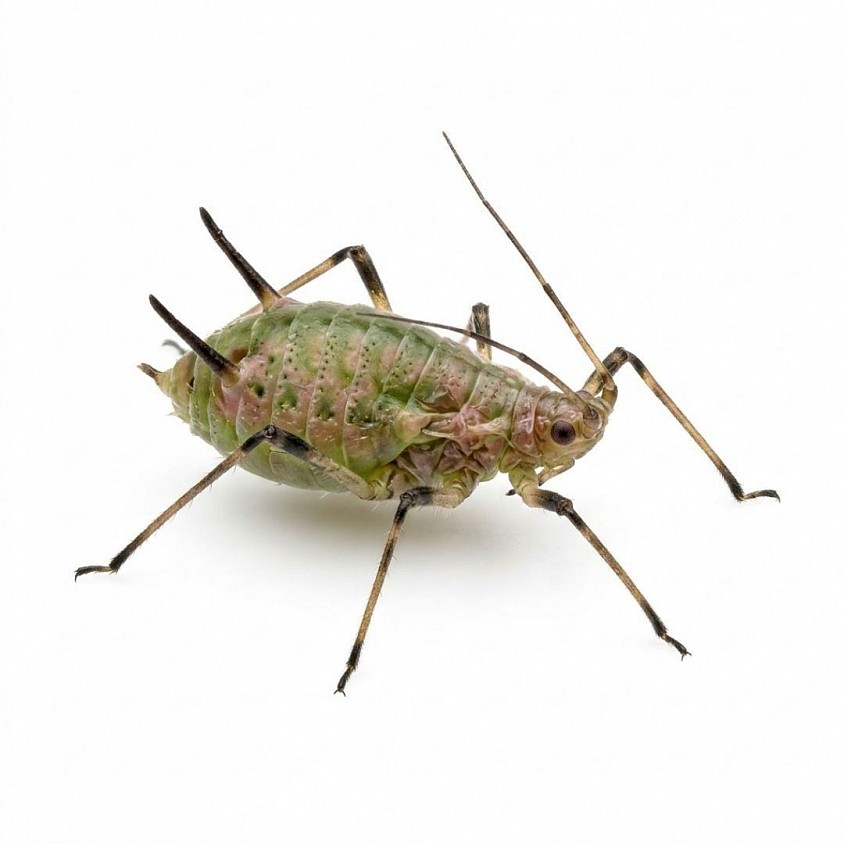
Aphids are among the most persistent pests affecting chili growers across South Africa. These tiny, soft-bodied insects—often green, black, or yellow—cluster on the soft growth tips, flower buds, and undersides of Ghost Pepper leaves during warm spring and summer flushes.
Damage: Aphids use piercing mouthparts to suck sap from the plant, causing leaves to curl, yellow, and stunt. As they feed, they excrete a sticky, sugary liquid called honeydew.
Secondary Threats: Honeydew quickly attracts black sooty mold, which coats the foliage and severely hinders photosynthesis. Aphids are also major vectors for plant viruses, including Cucumber Mosaic Virus (CMV), which can permanently stunt pepper plants.
Control: Wash minor infestations off with a direct stream of water from the hose. For heavier outbreaks, spray thoroughly with organic insecticidal soaps or neem oil formulations registered for garden use. Encouraging natural predators like local ladybirds and lacewings helps keep populations under control naturally.
🌶️ Red Spider Mites (Tetranychus urticae)
Red spider mites are microscopic arachnids that thrive during dry, hot South African summers, particularly on the Highveld and in dry indoor or greenhouse environments. Because they are tiny, they often go unnoticed until significant damage is already visible.
Damage: Spider mites puncture plant cells on leaf undersides to feed on sap, leaving fine yellow or bronzed stippling across the top surface of the leaves. In advanced infestations, delicate silk webbing coats the leaf axils and stem joints, leading to severe leaf drop and scorched, exposed plants.
Control: Regularly misting foliage or increasing surrounding humidity slows down spider mite reproduction. Spray affected leaves thoroughly with registered miticides, insecticidal soaps, or sulfur-based organic sprays, ensuring complete coverage on the undersides of leaves.
🌶️ Thrips (Including Western Flower Thrips and Citrus Thrips)
Thrips are minute, slender insects with fringed wings that feed aggressively on young pepper leaves, terminal shoots, and flower buds. In South Africa, both Western Flower Thrips and regional species like Citrus Thrips pose a notable threat to nightshades and peppers.
Damage: Thrips rasp the outer surface of leaf tissues and blossoms to feed on plant juices. This leaves behind a silvery or bronzed metallic sheen on leaves, curled leaf edges, and causes flower buds to drop before setting fruit.
Control: Hang blue or yellow sticky traps near your chili canopy to monitor adult activity. Biological control using beneficial nematodes, target sprays of organic Spinosad formulations, or applications of neem oil can effectively reduce thrips populations.
🌶️ American Bollworm (Helicoverpa armigera)
The American bollworm is one of South Africa's most notorious agricultural pests, attacking a wide range of crops including tomatoes, maize, and chili peppers.
Damage: Moths lay single, tiny eggs on leaves and flower buds. Once the caterpillars hatch, they chew directly into developing Ghost Pepper pods, feeding internally on the seeds and placenta. This causes young pods to turn brown, rot from the inside, or drop prematurely.
Control: Regularly inspect plants for small caterpillars or entry holes near the stem of the pepper. Hand-pick and destroy affected pods and caterpillars immediately. Biological controls containing Bacillus thuringiensis (Bt) are highly effective against young bollworm larvae when applied at the first sign of activity
🌶️ Whiteflies
Whiteflies are small, moth-like sap-sucking insects with powdery white wings. They thrive in warm climates and tend to settle in dense colonies on the undersides of Ghost Pepper leaves, flying up in small clouds when the foliage is disturbed.
Damage: Nymphs and adults feed on plant sap, weakening the vine and producing heavy honeydew that leads to sooty mold. Heavy infestations cause leaf yellowing, premature defoliation, and reduced fruit yields.
Control: Install yellow sticky cards around the base and canopy of the plants to catch adult whiteflies. Treat leaf undersides with insecticidal soaps or canola-oil-based contact sprays to smother eggs and crawling nymphs.
🌶️ Fruit Flies (Natal Fruit Fly and Mediterranean Fruit Fly)
In warmer fruit-growing regions of South Africa, fruit flies such as the Natal Fruit Fly (Ceratitis rosa) and Mediterranean Fruit Fly (Ceratitis capitata) can pose a threat to ripening Ghost Pepper pods.
Damage: Female fruit flies pierce the skin of maturing peppers to lay eggs inside the fruit wall. The hatching maggots feed on the internal pulp, leading to soft spots, decay, and premature pod drop.
Control: Hang commercial fruit fly bait traps or eco-friendly protein bait stations around the garden to attract and eliminate adult flies. Remove and destroy any fallen or soft fruit promptly so larvae cannot complete their life cycle in the soil.
What diseases commonly affect Giant Drumhead Cabbage, and how can they be prevented?
Growing the Giant Drumhead Cabbage (Brassica oleracea var. capitata) requires patience, space, and careful plant management. Because these massive heirlooms take upwards of four to five months to mature and develop dense, heavy heads, they remain exposed to environmental pathogens for much longer than standard cabbage varieties. Understanding the primary fungal and bacterial diseases that target brassicas, alongside rigorous prevention protocols, is essential to securing a healthy, undamaged harvest.
🥬 Black Rot (Xanthomonas campestris pv. campestris)
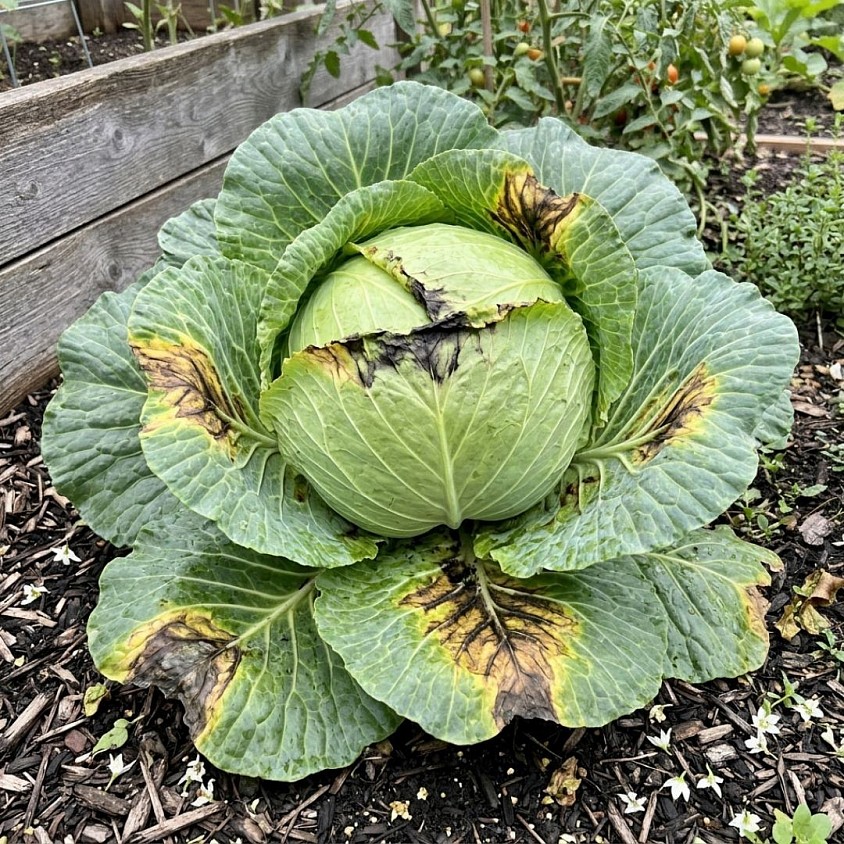
Black rot is widely considered one of the most destructive bacterial diseases affecting giant cabbages worldwide. The bacterium invades the plant through natural water pores (hydathodes) along leaf margins or through mechanical wounds caused by insects and tools.
Symptoms: The classic sign of black rot is the appearance of distinct V-shaped yellow lesions along the leaf edges, pointing inward toward the midrib. As the disease advances, the veins within these yellowed areas turn dark brown or black. Cutting the stem reveals a ring of blackened vascular tissue oozing bacterial slime in severe infections.
Impact: The disease cuts off nutrient and water transport, causing lower leaves to wither, stunt, and drop, ultimately preventing the central head from filling out properly.
🥬 Clubroot (Plasmodiophora brassicae)
Clubroot is a persistent, soil-borne protozoan pathogen that attacks the root system of brassicas and can survive in garden soil for over a decade.
Symptoms: Infected Giant Drumhead cabbages exhibit severe wilting on warm, sunny days, even when soil moisture appears adequate. Below the surface, the roots become swollen, distorted, and knobby, forming characteristic "clubs" that replace normal fine feeder roots.
Impact: The malformed roots can no longer absorb water or essential minerals, leading to stunted plant growth, pale or purplish foliage, and eventual plant death before head formation.
🥬 Downy Mildew (Peronospora parasitica)
Downy mildew is a cool-weather fungal disease that thrives in humid, wet conditions, particularly during early spring or autumn growth phases when leaves stay wet for prolonged periods.
Symptoms: The upper surface of older foliage develops irregular, pale yellow or light green spots. Directly beneath these spots on the underside of the leaf, a fluffy, grayish-white downy mold appears during cool, dew-heavy mornings.
Impact: Affected leaf tissue turns brown and papery, reducing the plant's photosynthetic capacity. Infection on young seedlings can cause death, while later infections compromise outer wrapper leaves.
🥬 Blackleg / Phoma Stem Canker (Plenodomus lingam)
Blackleg is a serious fungal pathogen that attacks both the stems and leaves of cabbage plants, often introduced through infected seeds or surviving in crop debris.
Symptoms: Leaves develop light brown, circular lesions dotted with tiny black specks, which are the spore-producing structures (pycnidia). The defining symptom occurs near the soil line: dark, sunken, oval-shaped cankers girdle the main stem, turning the tissue black and dry.
Impact: As the canker weakens the lower stem, the top-heavy Giant Drumhead cabbage easily snaps off at ground level under its own weight or during strong winds.
🥬 Fusarium Wilt / Cabbage Yellows (Fusarium oxysporum f. sp. conglutinans)
Fusarium wilt is a soil-inhabiting fungal pathogen that enters through root hairs and colonizes the water-conducting tissue during warm summer weather.
Symptoms: Early signs include a dull, yellow-green discoloration on one side of the plant or a single side of an individual leaf. The leaves warp, curl, and turn yellow before turning brown and dropping off. The interior vascular ring of the main stem shows a dark yellow to brown discoloration.
Impact: Plants infected early in the season remain severely stunted and fail to produce marketable or usable heads.
🥬 Comprehensive Disease Prevention Strategies
Preventing disease in Giant Drumhead Cabbages relies heavily on cultural control and sanitation, as treating established bacterial and soil-borne infections is rarely effective once symptoms appear.
Practice Strict Crop Rotation: Never plant cabbages or other brassicas (such as broccoli, kale, or radishes) in the same soil more than once every three to four years. Rotating crops starves soil-borne pathogens like Plasmodiophora brassicae and Xanthomonas.
Maintain Ideal Soil pH: Maintain a soil pH between 6.8 and 7.2. Clubroot prefers acidic soils, so applying agricultural lime to raise the pH above 7.0 significantly suppresses spore germination.
Ensure Adequate Air Circulation and Spacing: Giant Drumhead cabbages require substantial room—space plants at least 24 to 36 inches apart. Wide spacing speeds up leaf drying after rainfall or dew, curbing downy mildew and black rot.
Use Drip Irrigation: Avoid overhead watering. Drip irrigation or soaker hoses deliver water directly to the root zone, keeping leaves dry and preventing water-borne spores from splashing between plants.
Clear Crop Debris and Weeds: Remove and destroy crop residues immediately after harvest. Keep the surrounding area free of wild brassica weeds (such as mustard or wild radish), which act as wild hosts for cabbage diseases.
Start with Certified Seed and Resistance: Always source certified disease-free seeds or hot-water-treated seeds to ensure seed-borne pathogens like black rot and blackleg are not introduced into your garden beds.
Why Are My Atlantic Giant Pumpkins Rotting?
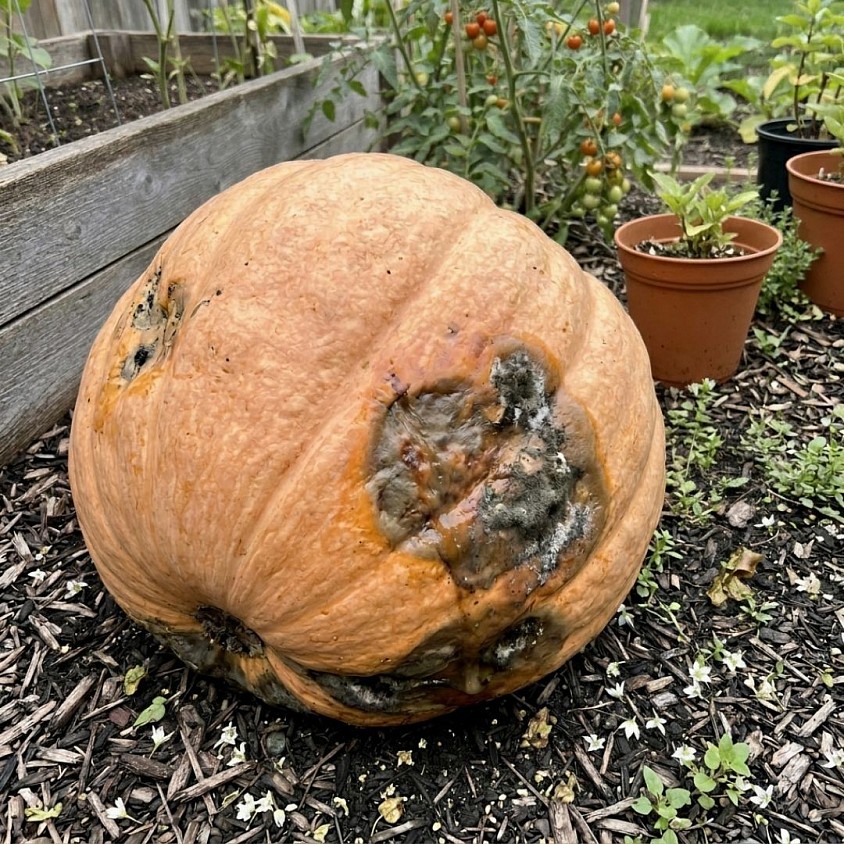
Growing Atlantic Giant pumpkins (Cucurbita maxima) is a high-stakes labor of love that requires months of meticulous care. Because these prized specimens grow at astonishing rates—sometimes adding over 30 to 50 pounds in a single day—their tissue is unusually soft, dense, and full of water. This makes them far more vulnerable to rot than standard garden pumpkins. Identifying why your pumpkin is rotting requires looking at fungal pathogens, environmental stress, pest activity, and cultural practices.
🎃 High Humidity and Excessive Soil Moisture
The single most common trigger for pumpkin rot is excess moisture around the base, vines, and fruit. When soil remains saturated or humidity stays high for extended periods, soil-borne fungal pathogens thrive and easily invade plant tissue.
Blossom-End Rot: Caused by localized calcium deficiency during rapid fruit growth, often triggered by inconsistent watering or overly wet soil, blossom-end rot starts as a dark, leathery spot at the blossom end that quickly turns into soft rot.
Gummy Stem Blight and Phytophthora Crown Rot: Caused by pathogens like Didymella bryoniae and Phytophthora capsici, these diseases infect stems, roots, and fruits, causing water-soaked lesions, gummy ooze, and rapid collapse of the pumpkin tissue.
Overwatering and Poor Drainage: Heavy clay soils or inadequate drainage trap standing water beneath the massive fruit, softening the bottom rind and inviting opportunistic soil microbes to break down the rind.
🎃 Soil Contact and Lack of Protective Barriers
Because an Atlantic Giant rests directly on the ground for months, the point of contact between the bottom rind and the soil is a primary risk zone.
Soil harbors countless natural bacteria and fungal spores, including Fusarium, Pythium, and Sclerotinia. As the heavy fruit presses down onto damp earth, moisture collects in the dark space beneath it. Without a physical barrier, the rind continuously absorbs soil moisture, softening its natural protective waxy layer and allowing fungi to penetrate the shell.
To prevent this, experienced growers never leave a giant pumpkin on bare earth. Placing a thick, elevated bed of clean sand, landscaping fabric, expanded polystyrene boards, or smooth wooden pallets lined with sand beneath the young fruit creates a dry microenvironment that stops bottom rot before it starts.
🎃 Pest Damage and Mechanical Wounds
Fungal pathogens struggle to breach an intact, healthy pumpkin rind on their own. In many cases, rot begins because an insect or physical injury broke the outer skin, opening an entry point for disease.
Vine Borers and Beetles: Squash vine borers (Melittia cucurbitae), cucumber beetles, and squash bugs bore into vines or nibble on young fruit rinds. The wounds they leave behind weep sap and allow rot-causing bacteria and fungi to enter.
Rind Cracking and Growth Splits: During peak growth spurts, sudden changes in water intake or high heat can cause the pumpkin's skin to split under pressure. If these growth cracks are not kept clean and dry, airborne spores immediately colonize the open wound.
Handling Injuries: Minor scratches from fingernails, garden tools, or abrasive debris on the ground can create microscopic lesions that rot weeks later.
🎃 Poor Sun Protection and Sunscald
While Atlantic Giant leaves require full sun to generate energy, the pumpkin fruit itself suffers under harsh, direct UV rays.
Exposing the developing pumpkin to intense afternoon heat and sunlight can lead to sunscald. The tissue cooks under the skin, forming hard, pale yellow or tan patches that eventually dry out, crack, and die. Once this tissue dies, secondary soft-rot fungi colonize the dead area, causing the entire pumpkin to decay from the top or side down.
Covering the growing fruit with a light-colored sheet, burlap, or a shaded crop canopy shields the sensitive rind, keeping it cool, flexible, and intact.
🎃 Prevention and Rescue Strategies
Preventing rot in Atlantic Giants requires proactive management throughout the growing season:
Build a Dry Base: Elevate the fruit on a bed of dry, coarse sand over landscaping fabric from the moment blossom set is confirmed.
Provide Overhead Protection: Erect a temporary shade structure or rain shelter over the fruit to protect it from harsh sunlight and heavy downpours.
Regulate Irrigation: Water deep at the root zone using drip irrigation rather than overhead sprinklers. Avoid getting water on the fruit, blossoms, or main vine crown.
Treat Early Wounds: If a small surface scratch or split occurs, keep the area completely dry, treat it gently with sulfur dust or diluted hydrogen peroxide to sanitize the wound, and run a small fan over it to encourage callousing.
Sanitize Tools: Always disinfect garden shears, knives, and measuring tapes before touching your vine or fruit to prevent cross-contaminating healthy tissue.
Can Carolina Reapers be dried?
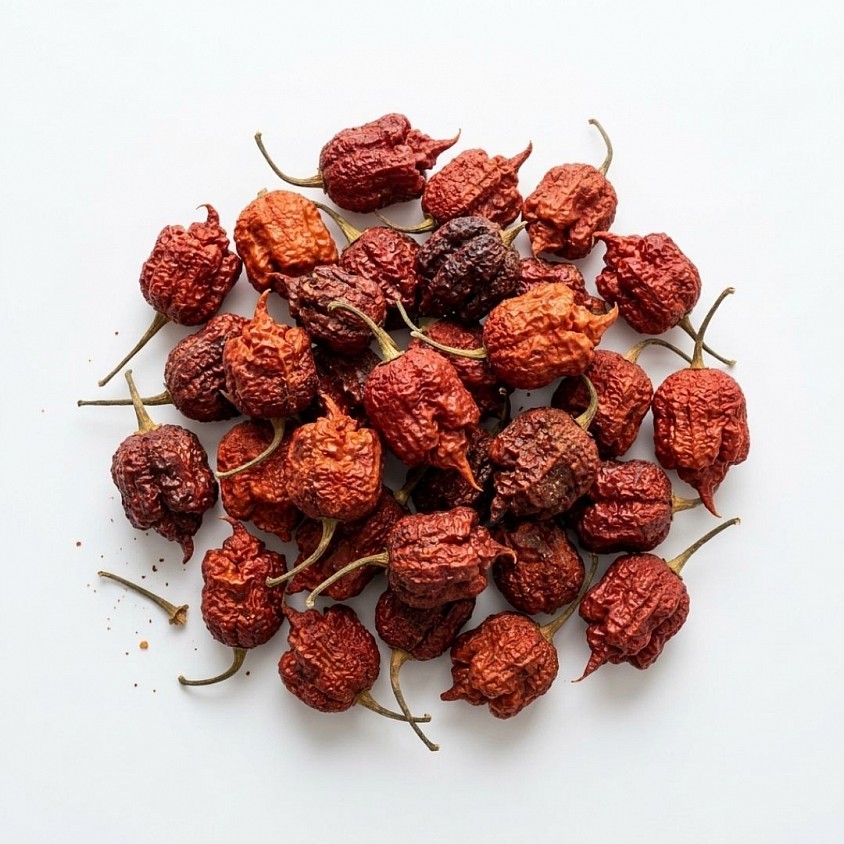
Yes, Carolina Reapers can absolutely be dried. In fact, drying is one of the most effective methods for preserving this infamous super-hot pepper. Because fresh Carolina Reapers have a limited shelf life, dehydrating them allows you to extend their usability for years while intensifying their signature heat and complex, fruity flavor profile. However, handling and drying the world's hottest pepper requires specific techniques and strict safety precautions to protect yourself from airborne capsaicin.
🌶️ Essential Safety Precautions First
Before undertaking any drying process, you must treat Carolina Reapers with extreme respect. The capsaicin oils present in super-hots can cause intense skin burns, severe eye irritation, and respiratory distress if inhaled during heating. Always wear thick nitrile or latex gloves when washing, cutting, or loading Carolina Reapers, and safety goggles are strongly recommended. Heating Carolina Reapers releases capsaicin vapor into the air, which can function like pepper spray inside an enclosed space, so run your drying equipment outdoors, on a covered patio, or directly next to an open window with an exhaust fan. Wash all tools, cutting boards, and gloved hands thoroughly after preparation, and never touch your face or eyes.
🌶️ Method 1: Food Dehydrator
Using a dedicated food dehydrator is widely considered the gold standard for drying Carolina Reapers because it provides precise temperature control and steady airflow to prevent scorching. Wash the peppers thoroughly and pat them completely dry before cutting off the stems and slicing each pepper in half lengthwise to open up the thick, waxy outer skin. Place the pepper halves in a single layer on the dehydrator trays with the cut sides facing up, leaving sufficient space between each piece for airflow. Set your dehydrator to a temperature between 125°F and 135°F (52°C–57°C) for 12 to 24 hours depending on ambient humidity and pod thickness. The peppers are fully done when they are completely brittle and snap cleanly under pressure without any rubbery texture or remaining moisture.
🌶️ Method 2: Oven Drying
If you do not own a food dehydrator, your kitchen oven can be used provided it can hold a low temperature, though extra caution is required to prevent indoor capsaicin fumes. Slice the washed peppers in half lengthwise and arrange them in a single layer without overlapping on a baking sheet lined with parchment paper. Set your oven to its lowest possible temperature setting, ideally between 140°F and 170°F (60°C–75°C), and prop the oven door open slightly with a wooden spoon to allow moisture to escape. Check the peppers every hour and turn them as needed over the course of 6 to 12 hours until they are dry, keeping a close eye on them to ensure they do not char.
🌶️ Method 3: Air Drying
Air drying is a traditional method that works well if you live in an environment with low humidity and warm, dry air. Using a needle and heavy thread or twine, puncture the thick green stem of each whole Carolina Reaper, stringing them into a garland with space between each pod for ventilation. Hang the string in a warm, dark, highly ventilated location away from direct rain or high humidity for roughly 2 to 4 weeks. Inspect the peppers periodically to ensure no mold forms around the stem base, as Carolina Reapers have thicker flesh than cayenne peppers and carry a higher risk of inner moisture retention if ambient humidity is too high.
🌶️ Storing and Using Dried Carolina Reapers
Once your Carolina Reapers are crisp and completely moisture-free, allow them to cool to room temperature before storing or processing. Whole dried pods store exceptionally well in airtight glass jars or vacuum-sealed bags kept in a cool, dark pantry, maintaining their heat and flavor for up to two years. You can also pulse dried pods in a dedicated spice grinder to make crushed pepper flakes or ultra-fine spice powder, provided you wear a mask and let the airborne spice dust settle before opening the lid. To use dried pods in hot sauces, marinades, or stews, simply steep them in boiling water for 15 to 20 minutes until soft before blending them into your recipe.
How to Tell When Black Bhut Jolokia Peppers Are Ready to Harvest
Cultivating the Black Bhut Jolokia—a striking, ultra-hot variation of the famous Ghost Pepper—is a rewarding journey for any chili enthusiast. However, determining the precise moment to harvest these menacing pods can be tricky. Unlike traditional red peppers that give an obvious signal when they ripen, the unique coloration of the Black Bhut Jolokia requires a keener eye. Knowing what to look for ensures you pick your peppers at peak heat, flavor, and visual appeal.
🌶️ Understanding the Color Shift
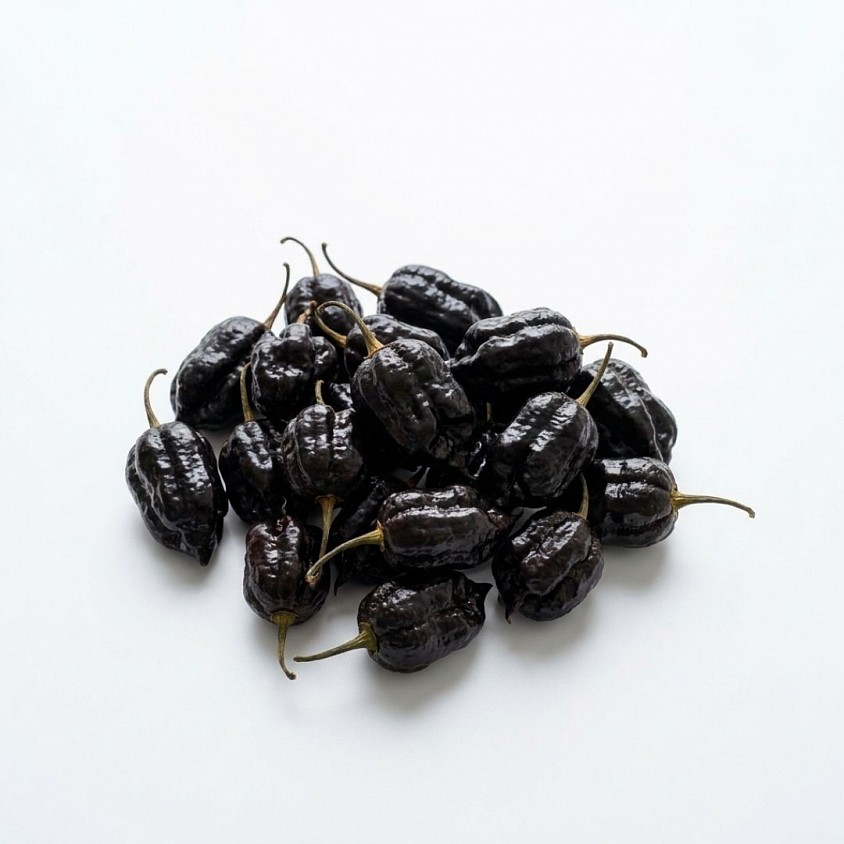
The primary indicator of maturity in Black Bhut Jolokia peppers is their distinct color progression. As the pod develops, it initially appears deep green before maturing into a dark, purplish-black or chocolate tone on the surfaces exposed to direct sunlight. However, true maturity is signaled by a subtle color shift on the shaded side or interior of the pod. As the fruit fully ripens, the dark exterior will soften into a deep mahogany brown, often accompanied by undertones or blushing of warm brownish-red near the stem or calyx. If the pod remains solid, dark forest green underneath, it is still developing and should remain on the plant.
🌶️ Assessing Skin Texture and Pod Firmness
Beyond color, touch and appearance provide vital clues. A fully mature Black Bhut Jolokia develops the signature bumpy, pimpled, and blistered skin characteristic of super-hot ghost pepper varieties. The skin will transition from a glossy finish to a slightly duller, waxy sheen as it reaches full ripeness. When gently squeezed, a ready pod should feel firm with a tiny amount of yield under pressure. Avoid picking pods that feel overly hard and rigid (which indicates under-ripeness) or soft and mushy (which means the pod is overripe or rotting).
🌶️ Observing Stem and Attachment Readiness
The connection point between the pepper and the main vine offers another reliable sign of readiness. On a fully ripe pod, the stem (pedicel) slightly thins near the branch, and the calyx—the green crown holding the top of the pepper—may display a faint fading or yellowing edge. When a Black Bhut Jolokia is ready for harvest, it will detach from the plant easily. A simple gentle lift and snap upward against the natural direction of growth should free the pod clean from the stem without tearing the plant's branches. If you have to pull hard, give the pod a few more days on the vine.
🌶️ Maximizing Heat and Flavor Profile
Harvesting at the correct stage directly impacts the pepper's chemical composition, particularly its capsaicin levels and aromatic volatile compounds. Super-hot peppers synthesize the vast majority of their capsaicinoids during the final ripening stage. Picking a Black Bhut Jolokia too early while it is predominantly green results in a lower Scoville rating and a harsh, grassy taste. Waiting for the complete dark-chocolate to reddish-brown color transition ensures you capture the maximum heat units alongside the rich, smoky, and slightly fruity flavor notes that make this ghost pepper variant so prized.
🌶️ Best Practices for Harvesting
When your Black Bhut Jolokia peppers meet all the criteria for ripeness, always use proper safety protocols during harvest. Wear nitrile or latex gloves when handling the pods to protect your skin from capsaicin oils, which can easily penetrate micro-tears in skin or stick to fingertips. Use clean, sharp bypass pruners or heavy-duty snips to cut the stem about half an inch above the cap, rather than pulling on the plant, to prevent damage to neighboring flower buds and immature fruit. Store harvested pods at room temperature for immediate use, or preserve them by dehydrating, freezing, or fermenting for long-term enjoyment.
What Are the Most Common Pests That Affect Giant Drumhead Cabbage in South Africa?
Cultivating the massive Giant Drumhead Cabbage (Brassica oleracea var. capitata) in South Africa is an incredibly rewarding endeavor, but it requires constant vigilance against local garden pests. Because giant cabbages take several months to develop their broad wrapper leaves and dense, heavy heads, insect infestations can quickly stunt leaf expansion, introduce viral diseases, or destroy the central growing point entirely.
Whether you are growing in the summer-rainfall regions of the Highveld or the milder coastal areas of South Africa, recognizing and managing the most common brassica pests is essential for protecting your crop and harvesting a record-breaking cabbage.
🥬 1. Diamondback Moth Larvae (Plutella xylostella)
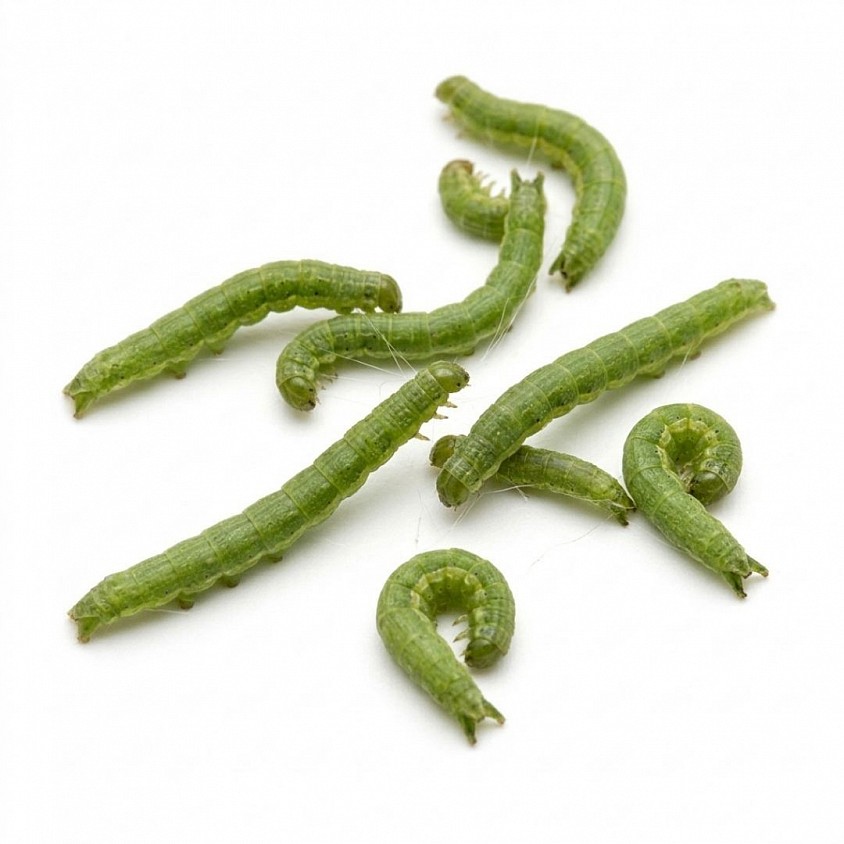
The Diamondback Moth larva is widely considered the single most destructive pest affecting cabbage crops across South Africa. The small, greyish-brown adult moths lay tiny eggs on the undersides of leaves, which hatch into slender, pale green caterpillars that feed aggressively on brassica foliage.
🥬 Damage Symptoms
Young larvae feed on the lower leaf tissue, leaving the upper clear epidermis intact and creating a distinct "windowpane" effect. As the caterpillars grow, they chew completely through the leaves, creating irregular holes. In severe infestations, the larvae tunnel directly into the developing cabbage head, contaminating it with frass (feces) and causing secondary bacterial rot.
🥬 Management in South Africa
Regularly inspect the undersides of wrapper leaves for small green caterpillars that wriggle backwards when disturbed. Applying biological sprays containing Bacillus thuringiensis (Bt) early in the morning or late evening provides highly targeted control without harming beneficial predatory insects.
🥬 2. Cabbage Aphids (Brevicoryne brassicae)
Cabbage aphids are small, soft-bodied insects covered in a characteristic powdery, greyish-white waxy bloom. They thrive in warm, dry weather and multiply at an astonishing rate across South African spring and summer seasons, forming dense colonies on the undersides of leaves and deep within the central folds of the cabbage.
🥬 Damage Symptoms
Aphids feed by piercing leaf tissue with sucking mouthparts to extract plant sap. This sap loss causes leaves to curl, yellow, and become severely distorted. Severe aphid feeding starves the cabbage of vital nutrients, resulting in stunted head growth. Additionally, aphids secrete a sticky, sugary substance known as honeydew, which leads to the growth of black sooty mould and attracts ants.
🥬 Management in South Africa
High-pressure water sprays can physically dislodge small aphid colonies from young plants. For persistent infestations, spraying with organic insecticidal soaps, neem oil, or canola oil-based mixtures early in the day effectively smothers the soft-bodied insects while protecting the blue-grey waxy bloom of the cabbage leaves.
🥬 3. Bagrada Bugs (Bagrada hilaris)
Also known as the painted bug, the Bagrada bug is an shield-shaped stinkbug marked with striking black, orange, and yellow patterns. Native to southern Africa, this pest is particularly troublesome in warm inland provinces during dry spells in early spring and late summer.
🥬 Damage Symptoms
Both adults and nymphs pierce the tender growing point (apical meristem) and young wrapper leaves of seedlings and young plants to suck plant juices. This feeding creates tiny white stippling marks that quickly turn into ragged, scorched holes as the leaves expand. Most critically, if Bagrada bugs damage the central growing tip of a young Giant Drumhead cabbage, the plant may fail to form a central head entirely, resulting in a useless "blind" cabbage or multiple small, unmarketable heads.
🥬 Management in South Africa
Because Bagrada bugs target young transplants, covering young cabbage plants with lightweight insect netting or floating row covers until they are well-established is an effective physical barrier. Keeping garden beds clear of wild brassica weeds (such as wild mustard) reduces local breeding grounds.
🥬 4. Cabbage Webworm (Hellula undalis) and American Bollworm (Helicoverpa armigera)
Caterpillars from both the Cabbage Webworm moth and the American Bollworm present serious seasonal threats to South African cabbage growers, particularly during the warm mid-summer months from December through February.
🥬 Damage Symptoms
Cabbage Webworm larvae produce fine silk webbing across the central growing point, feeding underneath this protective web and destroying the heart of the cabbage. American Bollworm caterpillars are larger, highly voracious feeders that chew large, ragged holes through outer wrapper leaves and bore deep into mature, firm heads, leaving large dark droppings behind.
🥬 Management in South Africa
Pheromone traps can be used to monitor adult moth activity in the patch. Hand-picking larger bollworm caterpillars off leaves in the late afternoon is effective for small garden plots, while preventative applications of organic Bt sprays target young larvae before they can bore inside the protective central head.
🥬 5. Snails and Slugs
In damp, shaded gardens—or during rainy summer spells across KwaZulu-Natal, Mpumalanga, and the Western Cape winter rainfall season—common garden snails (Cornu aspersum) and slugs pose a continuous threat to low-lying brassicas.
🥬 Damage Symptoms
Snails and slugs feed actively at night or on overcast days, chewing large, smooth-edged holes through the tender outer wrapper leaves and leaving telltale silvery slime trails across the plant and surrounding soil. They are especially destructive to young seedlings, which can be completely consumed overnight.
🥬 Management in South Africa
Clear away garden debris, fallen leaves, and weeds around the base of your cabbage patch to eliminate dark, moist daytime hiding spots. Surrounding the base of Giant Drumhead plants with crushed eggshells, coarse diatomaceous earth, or copper tape creates an abrasive barrier that deters soft-bodied mollusks, while pet-friendly iron phosphate snail bait offers effective long-term control.
How Do I Protect Atlantic Giant Pumpkins from Sunburn?
Growing a world-class Atlantic Giant pumpkin (Cucurbita maxima) requires months of soil preparation, precise watering, and intense vine management. However, as your pumpkin enters its exponential growth phase during the heat of mid-summer, its smooth skin becomes highly susceptible to sunburn (sunscald).
Protecting the skin of an Atlantic Giant is vital. Sunburn does not merely cause cosmetic discoloration; severe solar heat causes the outer epidermal tissue to harden, lose elasticity, and crack under internal growth pressure. Protecting your prize pumpkin from harsh direct sunlight is one of the most critical steps in preventing skin splits and premature harvest failure.
🎃 Understanding Sunburn and Sunscald in Giant Pumpkins
Atlantic Giant pumpkin tissue grows at an astonishing rate during peak summer, sometimes expanding by 10 to 20 kilograms in a single 24-hour period. For cell walls to stretch at this speed, the skin must remain soft, supple, and flexible.
When exposed to direct, unfiltered sunlight—especially during peak UV hours between 10:00 AM and 4:00 PM—the fruit’s skin absorbs intense radiant heat. This excessive heating bakes the outer epidermal cells, causing localized heat stress and sunburn. The skin hardens, turns pale white or yellowed and leathery, and loses its ability to expand. As the internal pulp continues to push outward, the rigid, sunburned skin eventually splits open, ruining the pumpkin and inviting rot.
🎃 1. Constructing a Shade Structure or Sun Tent
The single most effective method for preventing sunburn is erecting a dedicated shade structure directly over the developing fruit.
🎃 Recommended Shade Materials
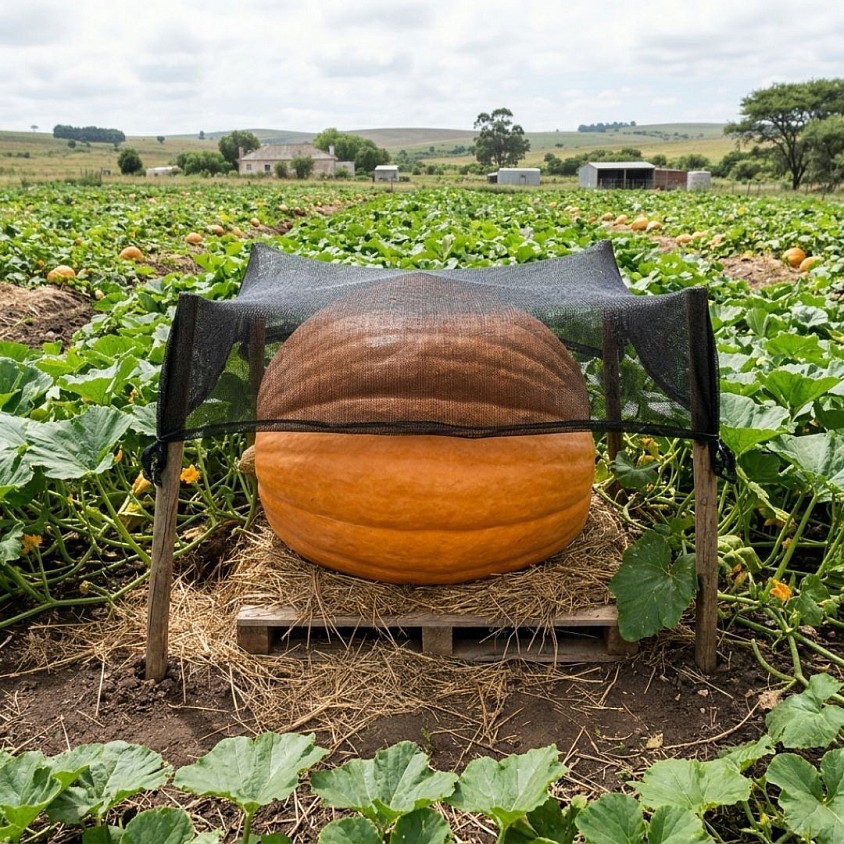
Professional growers use 30% to 50% white or light-colored horticultural shade cloth, light cotton sheets, or breathable burlap stretched over a light frame. Avoid using heavy dark Tarps or plastic sheeting, as these materials trap radiant heat underneath and create a greenhouse effect that bakes the pumpkin.
🎃 Proper Canopy Installation
Build a sturdy wooden or PVC pipe frame elevated at least 30 to 60 centimeters above the top of the pumpkin. Ensure the shade cloth extends past the sides of the fruit to protect it from harsh morning and late afternoon sun angles. The structure must remain open on the sides to allow free air circulation around the fruit, keeping ambient temperatures cool and preventing moisture buildup.
🎃 2. Using Protective Fabric Blankets
If constructing a shade tent is impractical, placing a light, breathable fabric directly over the pumpkin provides an easy and effective alternative.
🎃 Applying Bed Sheets or Light Blankets
Cover the entire pumpkin with a light-colored, 100% cotton bed sheet, light towel, or double layer of horticultural frost fleece. Light colors reflect solar radiation away from the fruit, keeping the skin cool to the touch even during high summer heatwaves.
🎃 Securing the Blanket
Anchor the corners of the sheet to the ground using landscape staples, smooth stones, or bricks. Ensure the fabric does not rest so heavily on the blossom end or stem attachment point that it places strain on the vine connection. Remove the blanket briefly during cool overcast periods or late in the evening to inspect the skin for pests or moisture accumulation.
🎃 3. Managing the Vine Canopy for Natural Shade
In a healthy giant pumpkin patch, the plant's own foliage can serve as a natural defense against the sun.
🎃 Strategic Leaf Positioning
When training main and side vines early in the season, preserve several large, healthy canopy leaves directly adjacent to the setting fruit. Position these leaves so their broad surfaces cast a natural shadow over the pumpkin throughout the day.
🎃 Vine Pruning Cautions
Be careful when pruning or repositioning vines near the pumpkin during mid-summer. Removing leaves that were previously shading the fruit suddenly exposes pale, tender skin to direct sunlight, leading to rapid sunscald within just a few hours. If you must prune nearby foliage to improve air circulation or vine access, immediately replace that natural shade with a fabric blanket or shade tent.
🎃 4. Cooling the Skin with Water and Airflow
Managing temperature around the fruit goes beyond simple shading; active cooling helps maintain skin elasticity during extreme heat spells.
🎃 Air Circulation
Stagnant, hot air surrounding a shaded pumpkin can still cause heat damage. Keeping the area surrounding the fruit mulched with clean, light-colored straw or dry sand reflects ambient ground heat away from the bottom of the pumpkin while insulating the root system.
🎃 Evaporative Cooling
During extreme heatwaves, lightly misting the shade cloth or bed sheet with clean water in the late morning creates an evaporative cooling effect that significantly lowers the ambient skin temperature of the pumpkin. Always ensure misting is done early enough in the day so the fabric dries completely before nightfall, reducing the risk of fungal soft rot or powdery mildew.
By implementing a breathable shade canopy, keeping the skin cool and flexible, and protecting tender foliage, you eliminate the risk of sunscald and allow your Atlantic Giant pumpkin to safely reach its true genetic weight potential.
Will a Growing Kit Improve Your Carolina Reaper Germination Rate?
Growing the Carolina Reaper (Capsicum chinense)—officially ranked among the world’s hottest chilli peppers—presents a unique set of challenges for gardeners. Known for its blisteringly high Scoville heat units, the Reaper is equally famous for being notoriously slow and finicky during the germination stage. While standard garden seeds like tomatoes or basil sprout within days, Carolina Reaper seeds can take anywhere from two to four weeks—or even longer—to show signs of life.
Many home growers turn to specialized seed-starting growing kits to boost their success rate. Understanding how a high-quality growing kit directly addresses the precise biological needs of super-hot chilli seeds will help you achieve maximum germination efficiency.
🌶️ The Biological Needs of Carolina Reaper Seeds
To understand why a growing kit makes a difference, it helps to examine what Carolina Reaper seeds require to break dormancy:
🌶️ Elevated Root-Zone Temperature
Unlike cooler-weather crops, super-hot chillies are tropical perennials. They require a consistent soil temperature of 27°C to 30°C to germinate reliably. If temperatures drop below 20°C, germination slows drastically or halts altogether, making seeds susceptible to fungal rot in damp soil.
🌶️ High, Controlled Ambient Humidity
The seed coat (testa) of a Carolina Reaper is tough and woody. Moisture must steadily soften this outer shell so the embryonic root can break through. High humidity keeps the seed coat soft and prevents the top layer of soil from drying out.
🌶️ Sterile, Well-Aerated Growing Medium
Compact or heavy garden soil starves seeds of oxygen and introduces soil-borne pathogens like Pythium, which cause damping-off disease. A sterile, light substrate provides the ideal balance of air pockets and moisture retention.
🌶️ How a Seed-Starting Kit Improves Germination Rates
A complete, high-quality seed-starting growing kit significantly improves germination rates because it creates a microclimate engineered specifically around these environmental demands.
🌶️ Heat Mats Provide Precise Warmth
The most valuable component included in or paired with advanced growing kits is a waterproof heat mat. Electric heat mats raise the root-zone temperature by 5°C to 10°C above ambient room temperature. This warm environment triggers rapid cell division inside the seed, shortening germination times from a sluggish 30+ days down to 10 to 18 days and raising overall sprout percentages significantly.
🌶️ Humidity Domes Lock in Micro-Moisture
Kits equipped with clear plastic humidity domes eliminate sudden moisture fluctuations. By trapping evaporating water, a dome creates a 100% relative humidity bubble. This prevents the surface soil from forming a dry crust that traps emerging seedlings and keeps the seed shell soft enough for the cotyledons (first leaves) to shed it cleanly.
🌶️ Sterile Soil Pellets and Seedling Trays
Most reputable seed kits supply sterile peat pellets, coco coir plugs, or specialized seed-starting plugs. These mediums are free from weed seeds, fungi, and bacteria. Their open, fibrous texture ensures proper drainage while holding just enough water, giving delicate primary roots easy pathing and high oxygen access.
🌶️ Comparing Growing Kits vs. Direct Garden Sowing
Sowing Carolina Reaper seeds directly into outdoor garden beds or basic pots without environmental controls often yields poor, inconsistent results. Outdoor spring weather fluctuates wildly; cool nights reduce soil temperatures, while midday heat or wind quickly dries out the topsoil. Uncontrolled outdoor germination rates for super-hot chillies often fall below 30% to 50%.
In contrast, using an indoor growing kit with controlled heat, sterile medium, and high humidity can boost Carolina Reaper germination rates up to 80% or 90% or higher. Controlled indoor germination also allows you to start seeds early in the season, giving your plants a substantial head start before summer arrives.
🌶️ Best Practices for Using a Growing Kit with Carolina Reapers
While a growing kit provides the ideal tools, proper technique ensures the best possible harvest:
1. Pre-Soak Your Seeds: Soak Carolina Reaper seeds in room-temperature water or weak chamomile tea for 12 to 24 hours prior to planting in your kit. This softens the outer shell and accelerates hydration.
2. Avoid Waterlogging: Keep the peat or coco coir plugs damp like a wrung-out sponge, but never saturated in standing water.
3. Provide Immediate Light Upon Sprouting: While seeds do not need light to sprout under the dome, the moment green shoots break through the surface, remove the dome and move the kit under a bright grow light or into direct sunlight to prevent tall, leggy seedlings.
4. Maintain Ventilation: Once seedlings emerge, open the vents on your humidity dome or remove it for short periods daily to encourage airflow and prevent fungal development.
A well-designed growing kit removes the guesswork from germinating Carolina Reaper seeds. By providing continuous heat, high humidity, and a sterile root environment, a growing kit directly solves the common causes of seed failure and delivers significantly higher, more reliable germination rates.
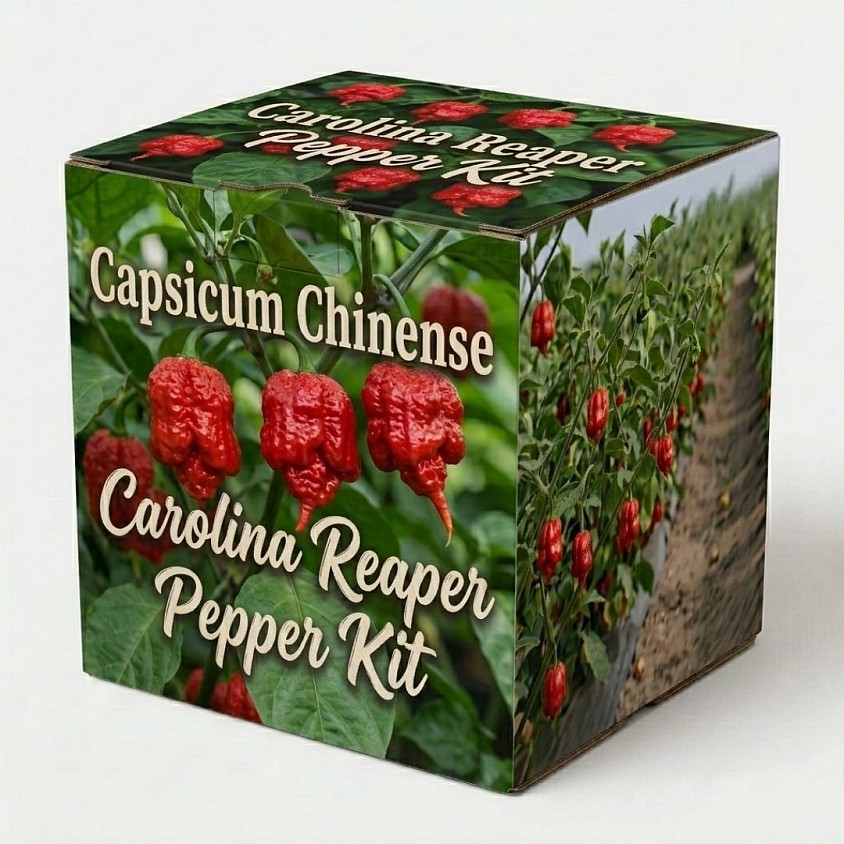
How Overwatering Affects a Ghost Pepper Plant: Signs, Impact, and Recovery
The Ghost Pepper (Capsicum chinense), historically known as the Bhut Jolokia, is famous for its extreme heat and tropical heritage. Originating from the hot, humid regions of Northeast India, this super-hot chilli thrives in warm conditions with well-draining soil. However, despite its tropical roots, one of the fastest ways to destroy a healthy Ghost Pepper plant is by overwatering it.
Because super-hot chilli plants require high oxygen levels around their root systems, excessive water creates a hostile underground environment. Recognizing the symptoms of overwatering early—and understanding how it damages the plant—is critical for saving your harvest.
🌶️ 1. Root Suffocation and Root Rot (Phytophthora and Pythium)
The most severe consequence of overwatering occurs underground. Soil is made up of solid particles, organic matter, and tiny air pockets. When you overwater a Ghost Pepper, these air pockets fill completely with water, starving the roots of vital oxygen.
Without oxygen, the root system begins to suffocate and die back. This waterlogged, anaerobic environment provides the perfect breeding ground for destructive soil-borne fungal pathogens such as Phytophthora and Pythium, which cause root rot. As root rot progresses, the plant's white, healthy feeder roots turn brown, soft, and slimy, losing their structural integrity and their ability to absorb water and nutrients.
🌶️ 2. Yellowing Leaves (Chlorosis) and Leaf Drop
One of the most noticeable visual symptoms of overwatering is the discoloration of the foliage. When roots suffocate or rot, they can no longer transport essential macro- and micronutrients—particularly nitrogen and iron—to the upper canopy.
As a result, the leaves lose their deep green color and develop chlorosis, turning a pale yellow. Unlike underwatered leaves, which often feel dry, crisp, and paper-thin, overwatered leaves feel soft, limp, and heavy. As the root damage worsens, the plant will shed its lower leaves rapidly in an effort to reduce its overall water demand.
🌶️ 3. Wilting Despite Wet Soil
A confusing symptom for many growers is seeing a Ghost Pepper plant wilt even though the soil is thoroughly saturated.
When a plant wilts from underwatering, it lacks soil moisture. However, when a plant wilts from overwatering, its root system has been so severely damaged by rot or oxygen deprivation that it can no longer draw water up into the stem and leaves. Seeing a drooping plant sitting in soggy soil is a classic sign of advanced root rot.
🌶️ 4. Blossom Drop and Poor Fruit Set
If an overwatered Ghost Pepper manages to survive into its flowering phase, water stress will severely impact pod production. Capsicum chinense varieties are notoriously sensitive during flowering.
Excessive moisture causes environmental stress that triggers the plant to produce ethylene, a natural plant hormone that leads to flower abortion. The stems holding the delicate white blossoms will yellow and snap off, preventing any peppers from forming. If small pods have already set, overwatering can cause them to turn yellow and drop off prematurely.
🌶️ 5. Edema and Stunted Growth
Prolonged overwatering disrupts the plant’s internal water pressure (turgor pressure). When the roots absorb water faster than the leaves can transpire it through their stomata, inner cells swell and burst.
This condition, known as edema, creates small, raised, blister-like bumps on the undersides of the leaves. Over time, these bumps harden into corky, white or brown spots. Edema impairs photosynthesis, resulting in severe growth stunting and misshapen foliage.
🌶️ How to Prevent and Fix Overwatering
To ensure your Ghost Pepper plant thrives, follow these practical cultural practices:
The "Knuckle Test": Only water your plant when the top 3 to 5 centimeters of soil feels dry to the touch. Never water on a rigid daily schedule.
Ensure Excellent Drainage: Plant in loose, well-draining soil amended with perlite, coarse river sand, or compost. If growing in pots, verify that the containers have ample drainage holes and never leave pots standing in water-filled saucers.
Allow the Soil to Dry Out: If you suspect mild overwatering, withhold water immediately and move potted plants into a bright, warm area with good air circulation to speed up soil drying.
Prune Damaged Roots: For severe container cases, remove the plant from its pot, gently wash away soggy soil, trim off dead or black mushy roots with sanitized shears, and repot it in fresh, dry potting mix.
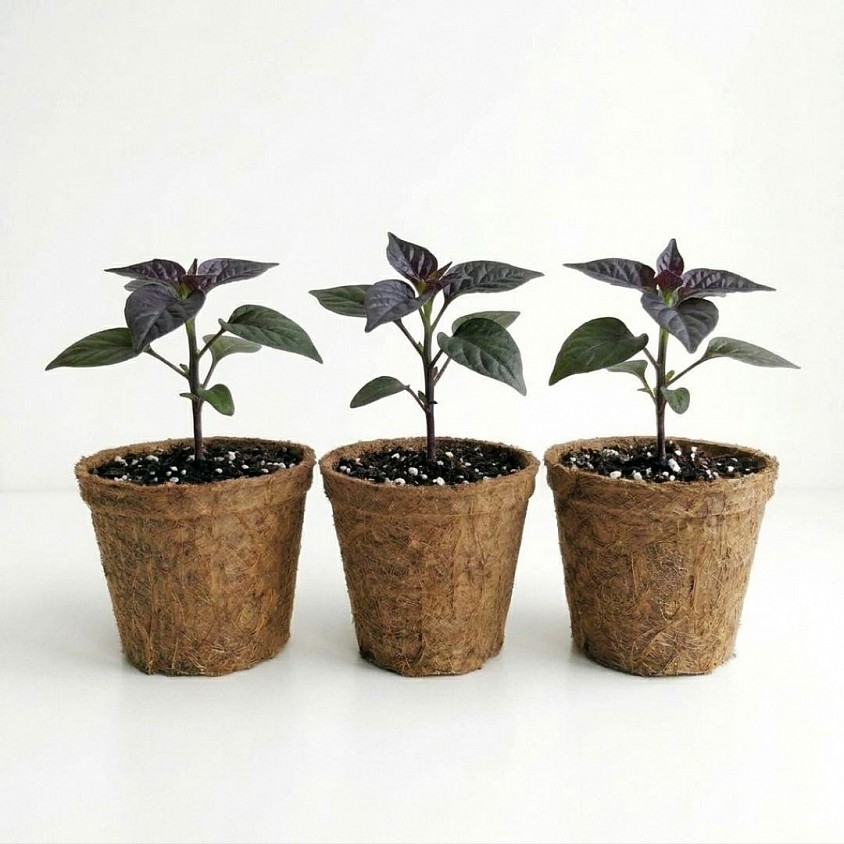
Can Giant Drumhead Cabbage Tolerate Frost in South Africa?
Growing giant brassicas in South Africa often means navigating wide seasonal temperature swings. From the cold, dry winter nights of the Highveld and Free State to the mild winters of coastal KwaZulu-Natal and the Western Cape, understanding your crop's temperature limits is crucial. If you are cultivating the iconic Giant Drumhead Cabbage (Brassica oleracea var. capitata), knowing its exact frost tolerance can make the difference between a record harvest and a ruined crop.
🥬 The General Frost Tolerance of Giant Drumhead Cabbage
The short answer is yes—Giant Drumhead Cabbage possesses excellent cold hardiness and copes very well with frost. As a classic cool-season crop, brassicas actually thrive in cooler weather, using lower temperatures to sweeten their leaves as starches convert into plant sugars.
A fully established, healthy Giant Drumhead cabbage can easily withstand light to moderate frosts where temperatures drop down to -3°C to -5°C for short durations during early morning hours. In fact, light light frost events often enhance leaf texture and flavor without causing any structural damage to the head.
🥬 How Much Frost Can It Handle before Damage Occurs?
While Giant Drumhead cabbages are tough, they are not frost-proof. The extent to which frost impacts your crop depends on the severity and duration of the cold spell, as well as the plant's maturity level.
Severe Frost (-6°C and Below)
When ambient temperatures drop below -6°C for extended hours, intracellular water inside the leaf cells begins to freeze, expand, and rupture cell walls. Severe freeze damage turns outer wrapper leaves translucent, soft, and water-soaked once unfrozen.
Prolonged Freeze Exposure
In frost-heavy regions like parts of Sutherland, the Eastern Cape highlands, or high-altitude areas of the Free State and Drakensberg, multiple consecutive days of hard freezes without daytime thawing can damage the tight central head. Frozen outer wrapper leaves may rot or split open as they thaw under strong midday sun, opening the door to bacterial soft rot.
🥬 Plant Maturity and Frost Susceptibility
A cabbage plant's vulnerability to cold changes dramatically throughout its growth cycle:
Young Seedlings and Transplants: Newly planted seedlings with delicate stems are the most vulnerable. A sudden freeze below -1°C can kill or severely stunt young transplants that have not been properly hardened off.
Actively Growing Vegetative Plants: Young plants with broad green wrapper leaves handle light frosts well, provided the central growing tip remains protected.
Mature, Fully Formed Heads: A large, dense Giant Drumhead head is exceptionally resilient. The thick layers of wrapper leaves insulate the inner core, allowing the central head to survive ambient frost even if the outermost leaves show light cold burn.
🥬 Protecting Giant Drumhead Cabbage from Hard Frost in South Africa
If you are growing in interior regions like Gauteng, Mpumalanga, the Free State, or the Karoo, where severe winter frosts occur between May and August, simple protective measures will safeguard your plants:
1. Frost Cloth or Horticultural Fleece: Cover mature cabbages or young seedlings with lightweight frost cloth late in the afternoon before temperature drops. Secure the edges with soil or rocks to trap ground warmth overnight, removing or venting it during warm sunny days.
2. Deep Surface Mulching: Apply a generous 5 to 10 cm layer of organic mulch—such as straw, sugarcane bagasse, or dried grass—around the base of the plant. Mulch insulates the root system against soil freezing and preserves soil moisture.
3. Morning Overhead Watering: If a heavy white frost coats your plants at dawn, gently misting the foliage with cold water from a hose before direct sun hits can slow down the thawing process, preventing rapid cell rupture.
4. Strategic Planting Dates: Time your planting calendar so that cabbages reach full size before heavy winter freezes settle in, or sow in late winter (August) so young plants grow into the warming spring weather.
By taking advantage of Giant Drumhead Cabbage's natural ability to handle temperatures down to -3°C to -5°C, South African home growers can confidently enjoy heavy, high-quality yields throughout the cooler months.