Klein Karoo Grow Kits - Blog Page
Why Are My Atlantic Giant Pumpkin Leaves Turning Yellow?
Watching the vibrant green leaves of your Atlantic Giant pumpkin (Cucurbita maxima) turn yellow can be concerning. Because giant pumpkin vines rely on massive leaf surface areas to act as "solar panels" driving energy into the fruit, healthy foliage is critical for achieving maximum pumpkin weight.
Leaf yellowing (known medically as chlorosis) is a signal that your vine is experiencing stress or a disruption in its biological processes. Identifying the root cause quickly allows you to correct the issue before it stunts vine growth or stops fruit expansion.
🎃 1. Watering Imbalances (Overwatering vs. Underwatering)
Watering issues are among the most common culprits behind yellowing giant pumpkin foliage.
Overwatering and Root Suffocation
Atlantic Giant pumpkin roots require high levels of oxygen to thrive. When soil remains continuously waterlogged, oxygen is pushed out of the root zone, causing the roots to suffocate and rot. When roots fail, they lose their ability to absorb essential nutrients, causing the lower, older leaves to turn pale yellow and go limp.
Underwatering and Heat Stress
If the vine is underwatered, particularly during hot summer days, the plant will prioritize keeping its growing tips alive by shedding older foliage. Leaves will turn yellow at the margins, crisp up at the edges, and eventually brown and drop off.
The Solution: Maintain deep, consistent watering that keeps the soil evenly moist like a wrung-out sponge, but never soggy. Ensure your planting bed or patch has excellent subterranean drainage.
🎃 2. Nutrient Deficiencies
Giant pumpkins are exceptionally heavy feeders. As the vine stretches rapidly across the patch, it quickly depletes specific soil nutrients required for chlorophyll production.
Nitrogen Deficiency
Nitrogen is responsible for healthy, dark green vegetative growth. Because nitrogen is a mobile nutrient within the plant, a shortage causes the vine to pull nitrogen from older leaves to feed new growth. As a result, the leaves nearest the main root turn light green and yellow first, while the growing tips remain green.
Magnesium Deficiency
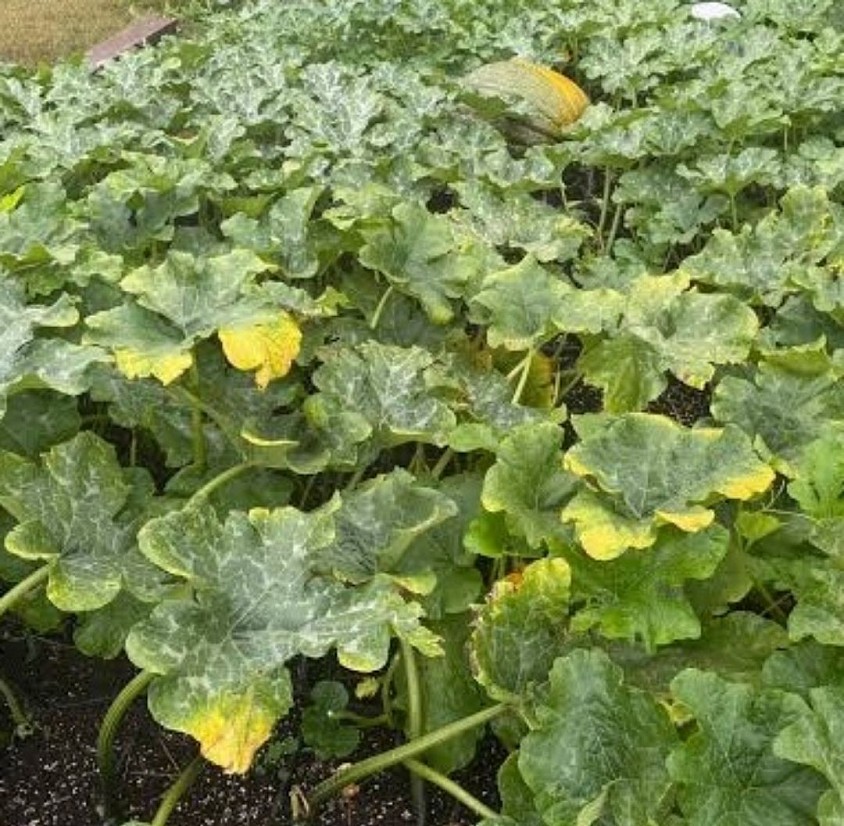
Magnesium sits at the core of the chlorophyll molecule. A magnesium deficiency manifests as interveinal chlorosis: the leaf tissue between the veins turns yellow while the main veins stay dark green, creating a distinct marbled or checkerboard pattern on mature leaves.
Iron or Sulfur Deficiency
If yellowing appears primarily on the young, newly emerging leaves near the vine tips while older leaves remain green, the issue is typically an immobile nutrient deficiency, such as iron or sulfur, often brought on by improper soil pH.
The Solution: Conduct a soil test to verify nutrient levels and adjust soil pH to the optimal range of 6.0 to 6.8. Apply a balanced organic fertilizer or liquid seaweed and fish emulsion to restore micro- and macro-nutrients.
🎃 3. Pests and Sap-Sucking Insects
Insect infestations can rapidly cause widespread leaf yellowing by draining the plant's vital sap and transferring viral pathogens.
Squash Bug and Spider Mite Damage
Squash bugs feed directly on leaf tissue, injecting toxic saliva that disrupts sap flow, causing leaves to speckle, yellow, and wither. Similarly, tiny spider mites feed on the undersides of leaves during hot, dry weather, causing a fine yellow stippling effect across the foliage.
Vine Borers
The larvae of the squash vine borer tunnel directly into the base of the main stem, severing the vascular bundle that transports water and nutrients to the leaves. The entire vine will rapidly turn pale yellow and wilt severely in the afternoon heat.
The Solution: Regularly inspect the undersides of leaves for eggs or small insects. Use organic insecticidal soaps, neem oil, or beneficial predators early in the season, and keep vine bases covered with soil or protective mesh to deter borers.
🎃 4. Fungal Diseases and Powdery Mildew
Fungal pathogens thrive in warm, humid conditions and are a frequent cause of leaf discoloration in giant pumpkins.
Powdery Mildew
Powdery mildew starts as white, powdery spots on the upper or lower surfaces of mature leaves. As the infection progresses, it blocks light from reaching the leaf tissue, causing the underlying leaf to turn bright yellow, die, and dry out.
Downy Mildew and Fusarium Wilt
Downy mildew causes angular, yellow spots bounded by leaf veins on the upper surface, accompanied by grayish fungal growth beneath. Soil-borne fungal diseases like Fusarium or Verticillium wilt attack the vascular system, leading to yellowing along entire vine sections.
The Solution: Water early in the morning directly at the base of the plant using drip irrigation rather than overhead sprinklers to keep leaves dry. Apply bio-fungicides or copper-based sprays preventatively as ambient humidity rises.
🎃 5. Natural Plant Aging (Senescence)
Not all yellowing indicates a crisis. As Atlantic Giant pumpkin vines mature late in the season, the very first leaves produced near the crown of the root system naturally age, lose their chlorophyll efficiency, turn yellow, and die back.
If only a few older, interior leaves near the original planting stump are yellowing while the rest of the vine and fruit remain vigorous, green, and expanding, this is simply a natural part of the plant’s lifecycle.
The Solution: Prune away dead or fully yellowed leaves near the base of the plant using sanitized shears to improve airflow, reduce disease risk, and keep your patch clean.
Can Carolina Reapers Be Grown in Pots? A Complete South African Guide
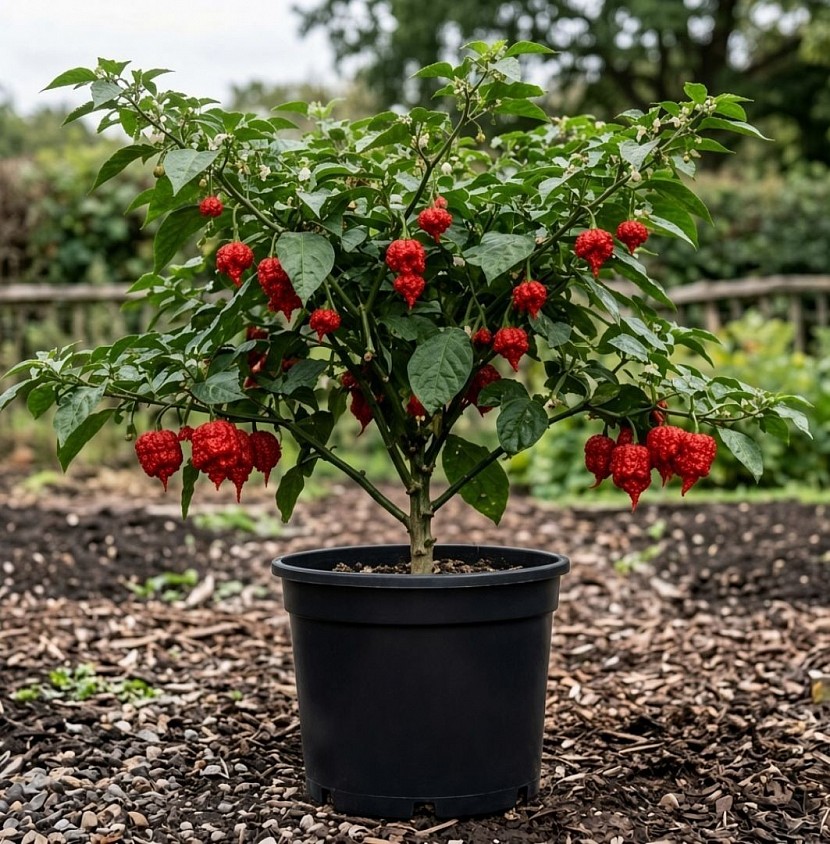
Growing the legendary Carolina Reaper (Capsicum chinense) in containers is not only possible—for many South African home growers, it is actually the most efficient and effective method. Potted Carolina Reapers allow you to control soil quality, optimize sunlight exposure, regulate moisture, and easily protect your plants from seasonal winter frost.
Whether you are growing on a sunny patio in Gauteng, a balcony in Cape Town, or a suburban garden in KwaZulu-Natal, container growing offers everything this record-breaking super-hot chilli needs to produce heavy yields of blistering red pods.
🌶️ Why Growing Carolina Reapers in Pots Works So Well in South Africa
Container gardening offers several distinct advantages tailored specifically to South Africa's climate and growing conditions.
First, pots grant total control over root warmth. Carolina Reaper roots thrive when soil temperatures remain consistently high. Black plastic nursery pots or fabric smart pots absorb thermal energy from the strong South African sun, keeping the root zone warmer for longer than ground soil—especially during early spring and late autumn.
Second, container planting solves local soil issues. Instead of battling heavy Highveld clay or fast-leaching coastal sand, growing in pots allows you to engineer a perfectly drained, nutrient-rich potting medium from day one.
Finally, pots make overwintering simple. In frost-prone inland areas like Gauteng, the Free State, and the North West, outdoor garden beds freeze during cold winter nights. Growing in containers allows you to simply pick up your mature Reaper plants in late May and move them to a protected patio, veranda, or greenhouse to survive the winter.
🌶️ Choosing the Right Pot Size and Type
Selecting the correct container size is critical to achieving maximum plant size and fruit production. While a young seedling starts well in a small tray or 1-liter nursery bag, a mature Carolina Reaper requires substantial space for its fibrous root system.
For best results, choose a pot with a minimum capacity of 20 liters (approximately 30 cm to 35 cm in diameter and depth). A 20-liter pot provides enough soil volume to support a bush reaching 1 to 1.5 meters in height while retaining sufficient moisture through intense summer heatwaves. Larger containers, such as 30-liter to 40-liter pots, yield even larger plants and heavier harvests.
Ensure your chosen container features generous drainage holes at the bottom. Fabric aeration pots (smart pots) are also an excellent choice, as they prevent root binding by air-pruning the roots while providing superior oxygen flow to the soil.
🌶️ Preparing the Ultimate Potting Mix
Super-hot chillies will quickly suffer from root rot if planted in dense, compacted garden soil or cheap potting soil that holds excessive water. Carolina Reapers require a light, airy, and free-draining potting mixture.
A highly effective container mix for South African conditions consists of:
2 parts high-quality commercial potting soil (for organic base nutrients)
1 part well-aged compost or vermicompost (for microbial life and steady feeding)
1 part perlite or coarse river sand (to guarantee rapid drainage and aeration)
Mix these components thoroughly before filling your pot. Aim for a slightly acidic to neutral soil pH between 6.0 and 6.8 for optimal nutrient uptake.
🌶️ Watering and Feeding Container-Grown Reapers
Because potted plants dry out much faster than ground beds—especially under high summer heat and dry afternoon winds—establishing a disciplined watering and feeding routine is essential.
🌶️ Smart Watering Strategy
Water deeply whenever the top 2 to 3 centimeters of soil feels dry to the touch. During hot mid-summer days in December and January, 20-liter pots may require daily morning watering. Always apply water directly to the base of the plant rather than the leaves to prevent fungal leaf spot. Be careful not to leave pots sitting in stagnant water trays, as soggy roots cause leaf drop and flower abortion.
🌶️ Balanced Nutrient Schedule
Container soils leach nutrients out over time due to frequent watering, so regular feeding is required:
Vegetative Stage (Spring): Apply a balanced organic liquid feed or seaweed extract every two weeks to encourage lush, green foliage and strong stem growth.
Flowering and Fruiting Stage (Summer): Once flower buds appear, switch to a fertilizer rich in potassium and phosphorus (such as organic flower-and-fruit food or tomato food) while reducing nitrogen. High potassium promotes heavy flowering, firm pod formation, and maximum capsaicin heat.
🌶️ Sunlight Placement and Seasonal Care
Place your potted Carolina Reaper in a location that receives at least 6 to 8 hours of direct, unfiltered sunlight daily. A north-facing patio, driveway, or garden lawn is ideal in South Africa.
During extreme late-summer heatwaves where temperatures exceed 35°C, providing light afternoon shade or moving pots under a 30% shade cloth helps prevent sunscald on ripening pods and stops flowers from dropping off the vine.
When autumn winds down in May, move your pots into a sheltered, frost-free spot to protect the root system, prune the branches back by one-third, and reduce watering. Come spring in September, bring your container back into full sun for a second, even bigger harvest season!
How Long Do Black Bhut Jolokia Seeds Take to Germinate in South Africa?
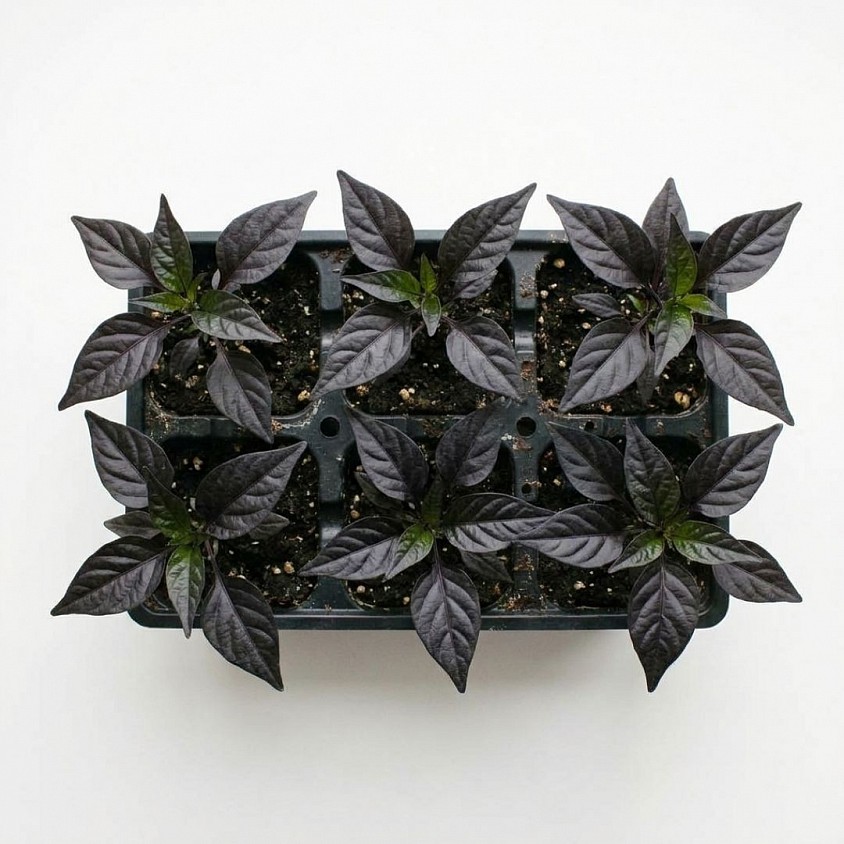
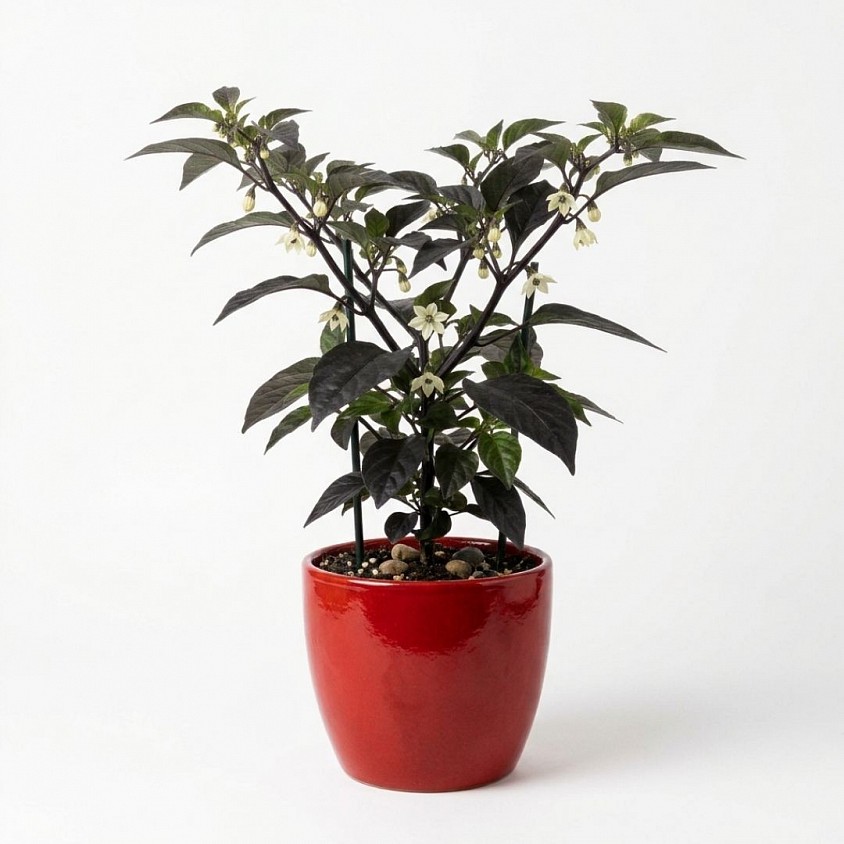
Growing super-hot chillies at home is an exciting challenge for South African gardeners, and the rare Black Bhut Jolokia (a striking dark variant of the famous Ghost Pepper) is a prized addition to any chilli patch. Known for its deep purple-black foliage, dark pods, and scorching heat exceeding 1,000,000 Scoville Heat Units, it demands extra care right from the start.
One of the most frequent questions growers ask is how long these seeds take to sprout. Understanding the exact germination timeline—and how to optimize it for South African conditions—is key to a successful harvest.
🌶️ The Typical Germination Timeline
Under ideal conditions, Black Bhut Jolokia seeds typically take 14 to 28 days (2 to 4 weeks) to germinate. However, because Capsicum chinense species are naturally slow to break dormancy, it is not uncommon for germination to stretch to 30 to 35 days (up to 5 weeks) if environmental factors are not perfectly dialed in.
Unlike fast-sprouting annuals like sweet peppers or tomatoes—which often pop up in 5 to 7 days—super-hot chillies require patience and consistent warmth. A seed that takes 4 weeks to germinate is completely normal, so avoid discarding seed trays prematurely.
🌶️ Temperature: The Primary Driver of Germination Speed
The single biggest factor dictating whether your Black Bhut Jolokia seeds sprout in 14 days or 35 days is medium temperature. Super-hot chilli seeds require a constant root-zone temperature between 27°C and 30°C to trigger germination efficiently.
If the ambient or soil temperature drops below 20°C, germination slows down drastically or halts entirely, making seeds vulnerable to rot in damp soil. In South Africa, spring temperatures can fluctuate significantly, with warm daytime sunshine followed by chilly nights—especially in interior regions like Gauteng, the Free State, and the Highveld.
To maintain a consistent 28°C environment, using a specialized seed heating mat or placing trays on top of a warm home appliance (like a refrigerator or decoder) inside a propagation dome yields the fastest results.
🌶️ Timing Your Planting Calendar in South Africa
To align with South Africa's seasonal cycles, timing your seed sowing correctly gives your slow-germinating Black Bhut Jolokia seedlings a crucial head start before high summer:
August to September (Late Winter / Early Spring): This is the ideal window to start Black Bhut Jolokia seeds indoors under controlled heat. Starting early ensures your plants develop strong stems and root structures by the time warm summer weather arrives.
October (Mid-Spring): Seedlings can be hardened off and transplanted into outdoor beds or containers once night temperatures reliably stay above 15°C across most provinces.
November onwards: Sowing seeds this late in the season reduces the total time your plants have to mature and ripen pods before autumn cool spells arrive in April and May.
🌶️ Essential Tips for Successful Germination
To ensure maximum germination rates with Black Bhut Jolokia seeds in the local climate, follow these practical guidelines:
1. Pre-Soak the Seeds
Soaking seeds in warm water or weak chamomile tea for 12 to 24 hours prior to planting softens the tough outer seed coat, accelerating moisture absorption and shortening germination times by several days.
2. Use a Sterile, Light Seed-Starting Mix
Avoid using heavy garden soil or pure compost in seedling trays, as they can compact and restrict oxygen to the germinating seed. Opt for a fine, well-draining seedling mix made of peat moss, vermiculite, and perlite.
3. Maintain Consistent Moisture Without Waterlogging
Keep the soil damp like a wrung-out sponge, but never soaking wet. Covering seedling trays with a clear plastic dome or plastic wrap retains humidity, preventing the top layer of soil from drying out under warm spring weather.
4. Provide Immediate Light Upon Sprouting
While seeds do not require light to sprout initial roots, the moment green shoots break through the surface, move them immediately under bright grow lights or into a sunny, north-facing window to prevent tall, leggy seedlings.
By maintaining high warmth (27°C to 30°C), starting seeds indoors around August or September, and keeping moisture levels consistent, your Black Bhut Jolokia seeds will break through smoothly, setting up a productive season of super-hot harvesting.
What Type of Soil Produces the Best Giant Drumhead Cabbage Heads? A South African Grower’s Guide
Growing record-breaking Giant Drumhead Cabbages (Brassica oleracea var. capitata) in South Africa requires more than just sunshine and regular watering—it starts from the ground up. Giant Drumhead cabbages are heavy feeders with extensive root systems, demanding a soil environment that balances rich organic nutrients, superb drainage, and steady moisture retention.
Whether you are cultivating in the sandy loams of the Western Cape, the rich clay-loams of the Highveld, or the red soils of Limpopo, understanding how to prepare and balance your soil is the single most important secret to growing dense, massive cabbage heads.
🥬 Ideal Soil Texture: Rich, Friable Loam
The absolute ideal foundation for giant brassicas is a deep, friable loam or sandy-loam soil. Cabbage roots need to expand rapidly without encountering dense, compacted layers.
In heavy clay soils common across parts of Gauteng, Mpumalanga, and the Free State, soil can become easily waterlogged during summer afternoon thunderstorms, leading to root rot or oxygen deprivation. Conversely, extremely sandy soils, often found in coastal regions, drain too quickly and leach out valuable plant nutrients before the heavy-feeding roots can absorb them.
To achieve the ultimate soil structure, heavy soils should be broken up and deeply amended with coarse river sand, well-rotted kraal manure, and organic compost. For sandy soils, generous applications of compost, vermicompost, and leaf mould help build the structure necessary to hold water and nutrients.
🥬 The Critical Role of Soil pH in South Africa
Giant Drumhead cabbages thrive in slightly acidic to neutral soil, with an ideal pH range between 6.0 and 6.8. Maintaining the correct pH is essential because it governs how efficiently the plant can draw up macro- and micronutrients from the earth.
In many parts of South Africa, soils tend to tilt towards acidity. Acidic soil (below pH 6.0) severely restricts the availability of crucial minerals like calcium and phosphorus, while simultaneously increasing the risk of *Clubroot*—a devastating fungal infection that causes swollen, deformed roots and stunted growth.
Before planting, conduct a basic soil test. If your soil pH is below 6.0, incorporate agricultural lime (dolomitic lime if magnesium is also low) at least four to six weeks prior to transplanting to gradually raise the pH into the optimal range.
🥬 Organic Matter and Nutrient Composition
Because a mature Giant Drumhead can produce massive leaf coverage, the soil must be loaded with readily available organic matter. Digging in high-quality compost or aged, well-rotted kraal manure at a depth of 30 to 40 cm ensures that the deep taproots and lateral feeder roots have constant access to biological nutrients.
Early in the growing phase, cabbage plants require high nitrogen levels to build their large green wrapper leaves, which act as the engine for energy production. Well-composted poultry manure or bone meal worked into the topsoil provides a excellent slow-release organic foundation.
As the plant transitions into forming its dense central head, nitrogen should be balanced with elevated levels of phosphorus and potassium. Potassium is vital for building dense, crisp cellular structures inside the head, while phosphorus promotes strong root expansion.
🥬 Moisture Retention and Soil Drainage
Giant cabbages consist primarily of water, meaning consistent soil moisture is essential for continuous cell expansion. However, there is a distinct difference between moist soil and soggy soil. Giant Drumhead roots require high oxygen levels; standing water causes root suffocating and severe growth stunting.
Working organic mulches—such as chopped straw, sugarcane bagasse, or pine bark—onto the surface of the soil serves a dual purpose in the South African climate. Mulch insulates the soil against the harsh midday sun, keeping root zones cool while preventing evaporation during dry spells or warm spring days.
By pairing a deep, well-draining loamy structure with a balanced pH of 6.5, abundant organic compost, and protective surface mulching, your soil will provide the perfect foundation to grow giant, show-stopping Drumhead cabbages anywhere in South Africa.
When Should I Plant Atlantic Giant Pumpkins in South Africa?
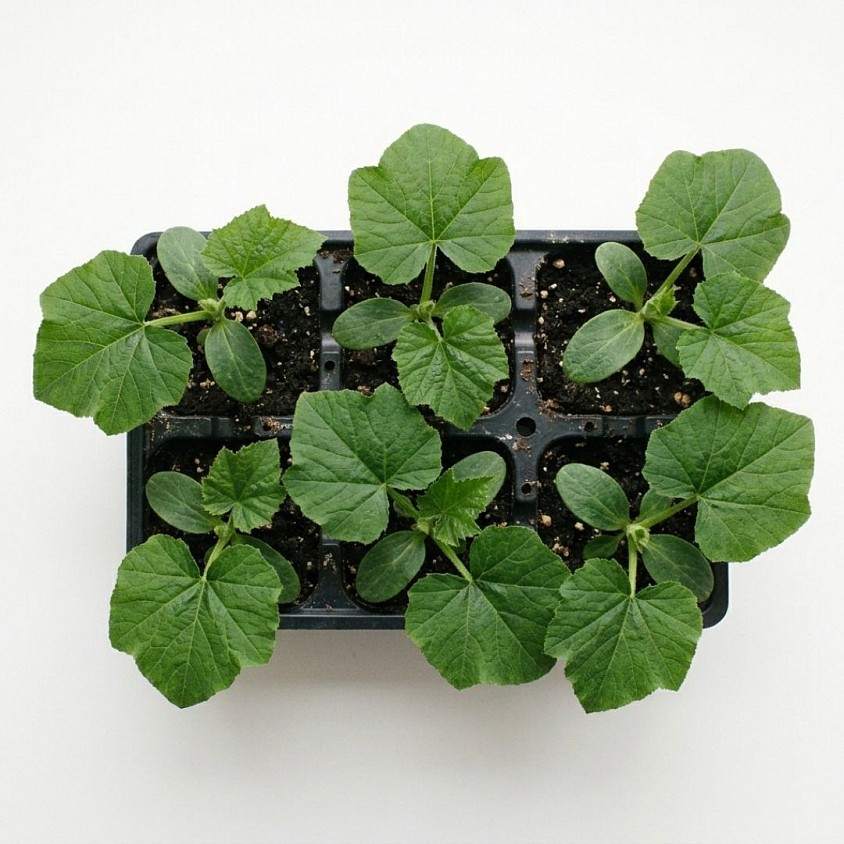
Growing Dill’s Atlantic Giant pumpkins (Cucurbita maxima) in South Africa requires careful planning to align with the spring and summer weather. Because Atlantic Giant pumpkins require a long, warm growing season of roughly 120 to 150 days to reach their massive size, planting at the right time ensures your vines establish rapidly and mature during peak summer conditions.
Whether you are growing a giant pumpkin for fun or aiming for official competition weigh-offs, timing your planting schedule correctly is the most important step in setting up your patch.
🎃 The South African Atlantic Giant Planting Window
In South Africa, the ideal window to sow Atlantic Giant pumpkin seeds spans from late August through October, depending on your local region and microclimate.
Because giant pumpkin seeds require warm soil to germinate—ideally between 21°C and 29°C—planting too early in cold spring soil can cause seeds to rot. Conversely, planting too late in summer reduces the total growing time available before autumn temperatures drop, capping your pumpkin's maximum size potential.
🎃 Regional Planting Timelines Across Provinces
Because South Africa features diverse climate zones, adjusting your planting timeline based on your province ensures optimum growth:
In interior frost-prone areas (Gauteng, Free State, Highveld regions, and North West), start seeds indoors or under protection in early to mid-September. Transplant seedlings into the ground in late September or early October once the final threat of late spring frost has safely passed and soil temperatures have warmed.
In warm interior and subtropical zones (Limpopo, Mpumalanga Lowveld, and coastal KwaZulu-Natal), warmer spring conditions allow for an earlier start. Seeds can be sown outdoors or in seedling pots as early as mid-to-late August or early September to capitalize on a long, warm season.
In the Western Cape and winter-rainfall regions, wait until mid-to-late September or early October when the rainy season subsides, soils dry out, and daytime warmth stabilizes.
🎃 Sowing Indoors vs. Direct Planting
To give your Atlantic Giant a head start, starting seeds indoors or in a greenhouse is highly recommended.
By sowing seeds in large peat pots or 1-liter nursery containers 2 to 3 weeks before your target outdoor planting date, you gain crucial development time while protecting young sprouts from unexpected cold spells, hail, or pests like snails and birds. Keep seed trays in a warm, sunny spot or on a seed heating mat to accelerate germination, which usually occurs in 4 to 7 days.
If direct-sowing outdoors, wait until October when soil temperatures remain consistently above 20°C day and night. Plant seeds about 2 cm deep in raised mounds of well-composting, loose soil, keeping the area moist but not waterlogged.
🎃 Key Milestones: From Planting to Harvest
Understanding the general growth schedule helps you monitor your plant's progress throughout the South African summer:
September to October is the germination and establishment phase. Seedlings focus on developing deep taproots and setting strong true leaves.
November to December brings explosive vine growth and flowering. Main vines can stretch up to 15 to 30 centimeters a day during peak growth. Hand-pollinate female flowers in December to set your target fruit.
January to February is the rapid fruit expansion period. The selected pumpkin consumes immense amounts of water and nutrients, adding significant weight daily during high summer.
March to April is the ripening and harvest window. As autumn approaches and vine growth slows, the pumpkin skin hardens and ripens into its characteristic orange shade, ready for weighing or harvesting.
Can You Grow Carolina Reapers at Home? A Guide to Growing the World’s Hottest Chilli in South Africa
Growing the legendary Carolina Reaper (Capsicum chinense) at home is not only possible—it can be immensely rewarding. Clocking in at over 1.5 to 2.2 million Scoville Heat Units (SHU), the Carolina Reaper requires patience, warmth, and a long growing season.
Fortunately for local gardeners, South Africa offers an exceptional climate for growing super-hot chillies. With hot summers, intense sunshine, and long daylight hours, South African conditions mirror the warmth these tropical peppers need to reach their maximum size and heat potential.
🌶️ South Africa’s Climate: The Perfect Environment for Super-Hots
Carolina Reapers originate from tropical backgrounds, meaning they thrive in daytime temperatures ranging between 24°C and 32°C. They are highly sensitive to frost and struggle when night temperatures drop consistently below 15°C.
South Africa’s climate zones provide ideal outdoor conditions across most provinces during the summer months:
In the Highveld and interior regions (Gauteng, Free State, and North West), warm, sunny summers with day temperatures consistently pushing into the upper twenties and low thirties allow Carolina Reapers to flourish rapidly. Care must be taken to plant only after the late spring frost risk passes.
In coastal and subtropical zones (KwaZulu-Natal, Mpumalanga Lowveld, and Limpopo), the extended frost-free seasons and elevated ambient humidity create ideal conditions where Reaper plants can grow into massive, high-yielding bushes.
In the winter-rainfall Western Cape, Carolina Reapers perform brilliantly throughout the dry, hot summer months, provided they receive deep, consistent root watering and protection from heavy afternoon winds.
🌶️ Navigating the South African Planting Calendar
Because Carolina Reapers are slow to germinate (often taking 14 to 21 days or longer) and require up to 90 to 120 days after transplanting to produce fully ripe red pods, timing your planting calendar is crucial.
Late winter to early spring (August to September) is the time to sow seeds indoors or in a sheltered seedling tray. Utilizing a warm spot or heating mat helps achieve the optimum germination temperature of 27°C to 30°C.
Mid to late spring (October to November) is the time to plant outdoors. Once night temperatures stay reliably above 15°C and all frost danger has passed, harden off seedlings and plant them into garden beds or containers.
Summer (December to February) is the peak growing phase. High summer heat drives rapid foliage growth, flowering, and early pod setting. Ensure plants receive at least 6 to 8 hours of direct, unfiltered sunlight daily.
Autumn to early winter (March to May) is harvest season. As the late summer sun ripens the pods from green to brilliant, tail-tipped red, harvest fruit regularly. In frost-free regions, plants will continue producing well into May.
🌶️ Soil Preparation, Pots, and Feeding Routine
Carolina Reapers demand well-draining, nutrient-rich soil with a slightly acidic to neutral pH (around 6.0 to 6.8). Waterlogging is the fastest way to cause root rot, so heavy clay soils should be amended with coarse sand, compost, or perlite.
If planting in pots, choose a container that holds at least 20 liters (approximately 30 cm to 35 cm in diameter) with generous drainage holes. Black nursery pots work exceptionally well because they absorb environmental heat, keeping the root system warm.
When feeding, avoid excessive high-nitrogen fertilizers during the flowering stage, as too much nitrogen causes the plant to produce lush green leaves while dropping its blossoms. Transition to a fertilizer higher in potassium and phosphorus (such as organic seaweed extract or a balanced flower-and-fruit plant food) once flowers appear to encourage dense pod production and intense capsaicin development.
🌶️ Overwintering Carolina Reapers in South Africa
Unlike standard annual garden vegetables, Carolina Reaper plants are short-lived perennials in their native habits. In South Africa, you do not need to discard your healthy reaper plants at the end of autumn.
If you live in a frost-prone area like Gauteng or the Free State, prune the plant back by roughly one-third in late May, reduce watering, and move the potted plant into a sunny porch, greenhouse, or indoor spot away from cold drafts.
When spring arrives in September, move the plant back into full sun and resume regular watering and feeding. Overwintered Carolina Reaper plants boast an established root system, resulting in a much faster start and significantly larger harvest during their second summer.
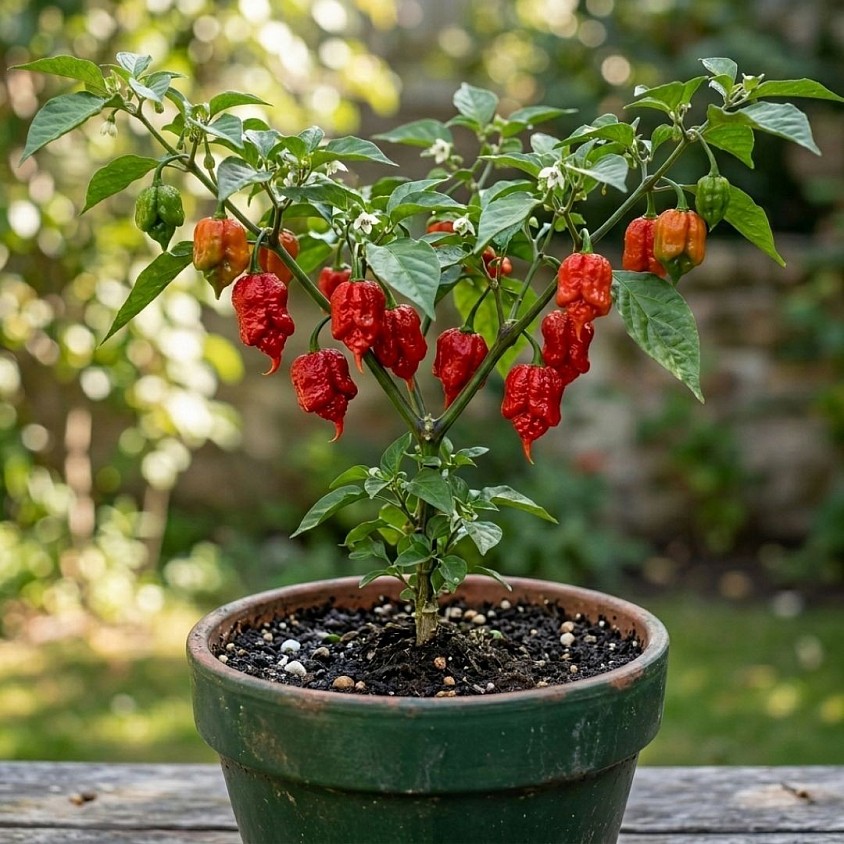
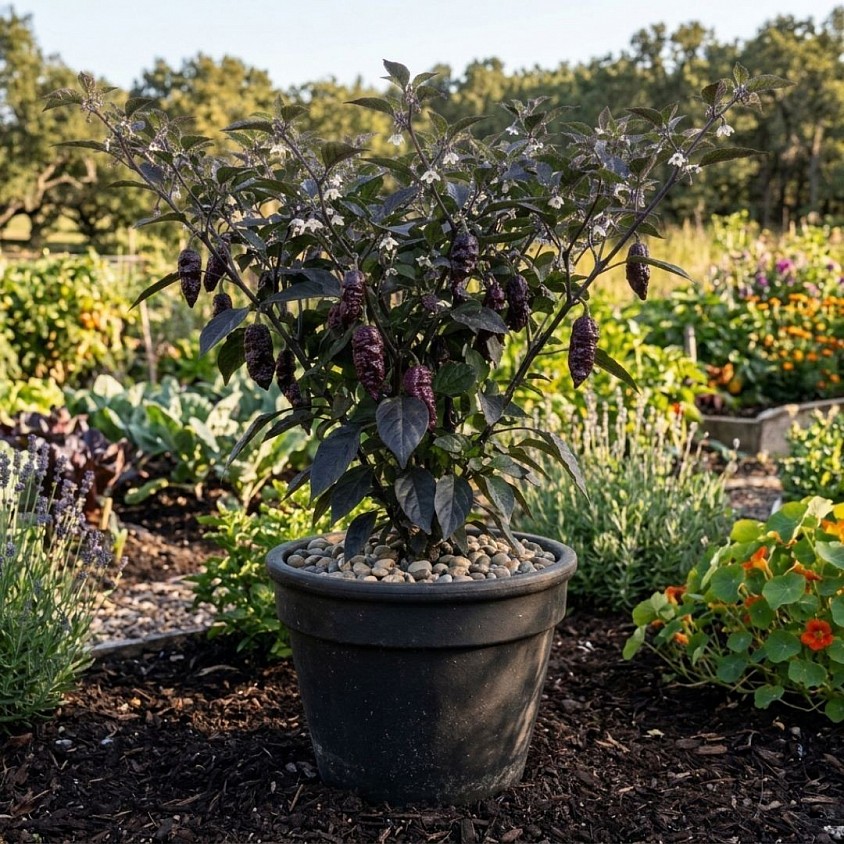
Why is the Bhut Jolokia Known as a "Ghost Pepper"?
The Bhut Jolokia is one of the most famous chili peppers in the world. Revered for its extreme heat, legendary flavor profile, and historical significance as the former Guinness World Record holder for the world's hottest chili, it holds a unique place in culinary culture. However, long before it became a popular challenge pepper in global media, it earned its intriguing name in its native region of Northeast India.
🌶️ Linguistic Origins in Assamese Culture
The primary reason the Bhut Jolokia is known as the "Ghost Pepper" comes down to an English translation of the Assamese language. The chili originates from the northeastern states of India, particularly Assam, Nagaland, Manipur, and Arunachal Pradesh. In the Assamese language, the word "Bhut" (or "Bhoot") translates directly to "ghost" or "spirit." The word "Jolokia" means "chili" or "pepper."
Therefore, a literal, word-for-word translation of "Bhut Jolokia" into English yields "Ghost Pepper." While local dialects across the region sometimes refer to it by other regional names—such as Naga Morich or Raja Mircha ("King Chili")—it was the translated name "Ghost Pepper" that caught on globally.
🌶️ Alternate Linguistic Interpretations
Although "Ghost Pepper" is the accepted literal translation, linguists and cultural researchers in Assam point out a subtle double meaning embedded in the regional history. In addition to meaning "ghost," the word "Bhut" in some local contexts refers to the Bhotia people, an ethnic group associated with the neighboring region of Bhutan.
Historically, trade routes connected Bhutan with Assam, and some scholars believe the chili may have been referred to as the "Bhutanese Chili" (Bhotia Jolokia) as it traveled down trade routes into the plains. Over time, as spoken pronunciations shifted, the term merged phonetically with "Bhut", cementing the connection to the Assamese word for ghost.
🌶️ Legendary Folklore and Heat Characteristics
Beyond pure linguistics, the "Ghost Pepper" moniker stuck in popular culture because it fits the supernatural nature of the pepper itself. Long before modern testing measured capsaicin concentrations, indigenous communities used the Bhut Jolokia for medicinal, protective, and agricultural purposes.
The name "ghost" is fitting because the pepper's extreme heat has a subtle, "sneaky" delivery. Unlike some chilis that burn instantly upon touching the tongue, the Bhut Jolokia's heat onset is notoriously delayed. A taster often experiences a fruity, sweet flavor initially, only for the intense capsaicin burn to creep up quietly seconds later—haunting the palate long after the initial bite.
🌶️ Global Recognition and the Ghost Pepper Craze
The name "Ghost Pepper" was introduced to the wider world in the mid-2000s when agricultural scientists at New Mexico State University's Chile Pepper Institute studied the crop. In 2007, the Guinness World Records officially certified the Bhut Jolokia as the world's hottest chili pepper, measuring over 1,000,000 Scoville Heat Units (SHU).
When news outlets and food historians reported on this record-breaking Indian chili, the translation "Ghost Pepper" captivated the media. Its catchy, memorable name helped transform an ancestral crop from Northeast India into a global culinary phenomenon.
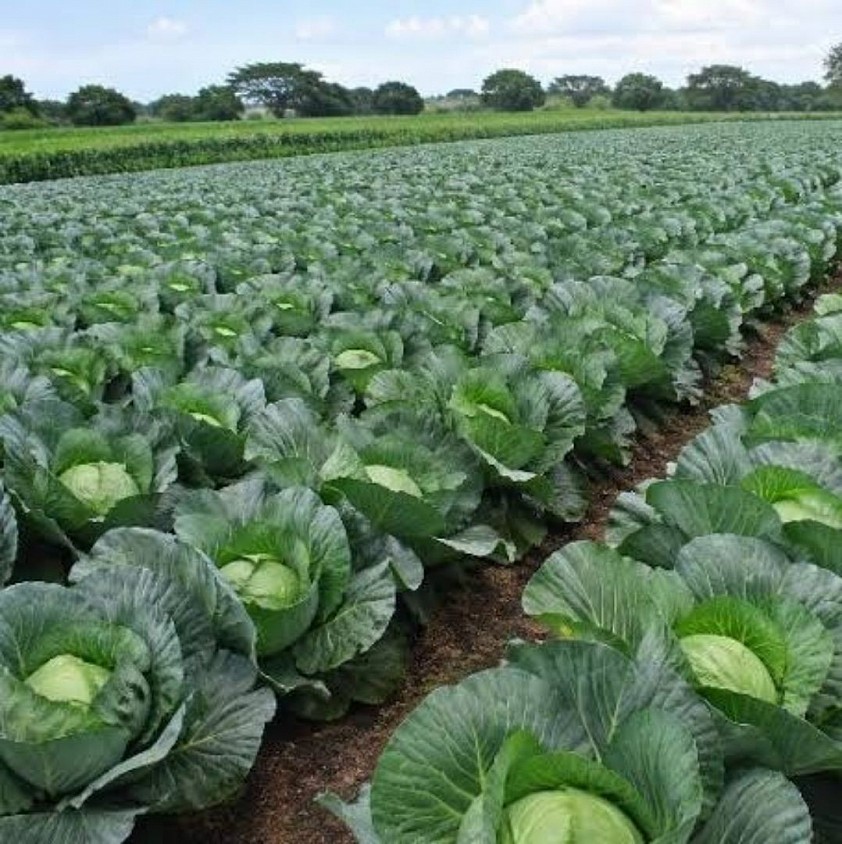
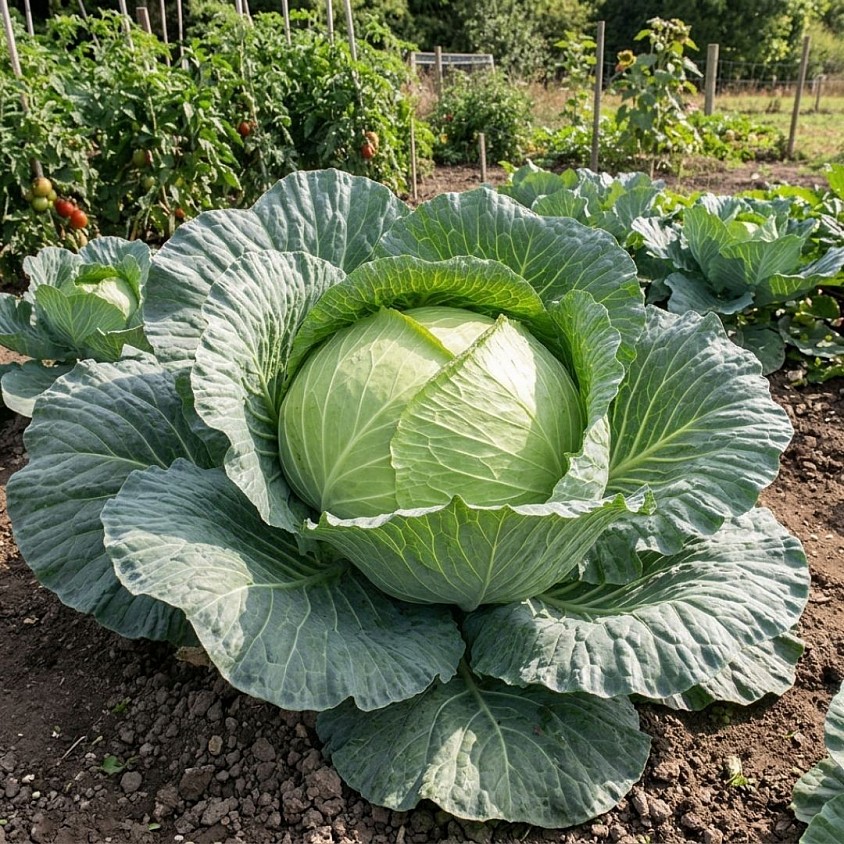
How Large Can a Mature Giant Drumhead Cabbage Head Become?
When it comes to giant vegetable gardening, the Giant Drumhead Cabbage (Brassica oleracea var. capitata) stands out as one of the most impressive and rewarding crops to cultivate. Known for its extraordinary scale, tight head formation, and broad outer frame leaves, this heirloom brassica has long been a favorite for homesteaders, market gardeners, and competitive giant vegetable growers alike.
Understanding the full size potential of a mature Giant Drumhead cabbage requires looking at both standard garden yields and extraordinary competitive records.
🥬 Standard Mature Size and Weight
Under typical home garden conditions, a fully mature Giant Drumhead cabbage head usually reaches a diameter of 12 to 18 inches (30 to 45 cm) across the central dense core. When including the wide, protective outer wrapper leaves, the entire plant spread can easily span 3 to 4 feet (90 to 120 cm) in diameter.
In terms of weight, a standard home-grown Giant Drumhead head typically weighs between 15 and 20 pounds (7 to 9 kg). With rich soil, ideal cool-weather growing conditions, and ample spacing, healthy patch-grown heads frequently push up to 30 to 40 pounds (13.5 to 18 kg).
🥬 Peak Potential under Competitive Conditions
When grown specifically for exhibition or competitive weigh-offs, Giant Drumhead cabbages can exceed standard sizes by a wide margin. Dedicated growers utilize deep organic soil beds, precise drip irrigation, high-potassium feeding schedules, and pest barrier netting to maximize leaf mass and head density.
Under these optimized exhibition conditions, mature cabbage heads routinely achieve weights of 50 to 80 pounds (22 to 36 kg). At this scale, the central head can grow larger than a basketball, supported by massive, fan-like frame leaves that act as solar panels driving energy directly into the solid interior core.
🥬 World Records and Historical Extremes
While Giant Drumhead genetics lay the foundation for huge yields, extreme world-record cabbages often involve specialized giant cabbage strains optimized over decades of selective breeding. The official world record for the heaviest cabbage stands at an astonishing 138.25 pounds (62.71 kg), grown by Scott Robb in Alaska in 2012.
Alaska’s long summer days—offering up to 20 hours of continuous sunlight—provide the ultimate environment for cell division in brassicas. While reaching over 100 pounds requires such unique northern daylight conditions, the Giant Drumhead lineage remains one of the primary genetic backbones used to achieve these world-class proportions.
🥬 Key Factors That Influence Final Size
To reach maximum size, a Giant Drumhead cabbage needs long, cool growing periods. Cabbages are cool-season crops that perform best in temperatures between 50°F and 68°F (10°C to 20°C). Heat stress causes premature heading or bolting, which severely limits the final weight.
Proper spacing is equally vital. Planting Giant Drumhead cabbages at least 3 feet apart prevents root competition and ensures the lower wrapper leaves have sufficient space to expand. Combined with consistent moisture, high nitrogen during early leaf development, and elevated potassium during head formation, Giant Drumhead cabbages will reliably grow into true giants in any vegetable patch.
Unlocking the Vault: Which Atlantic Giant Pumpkin Seeds Have the Best Genetics?
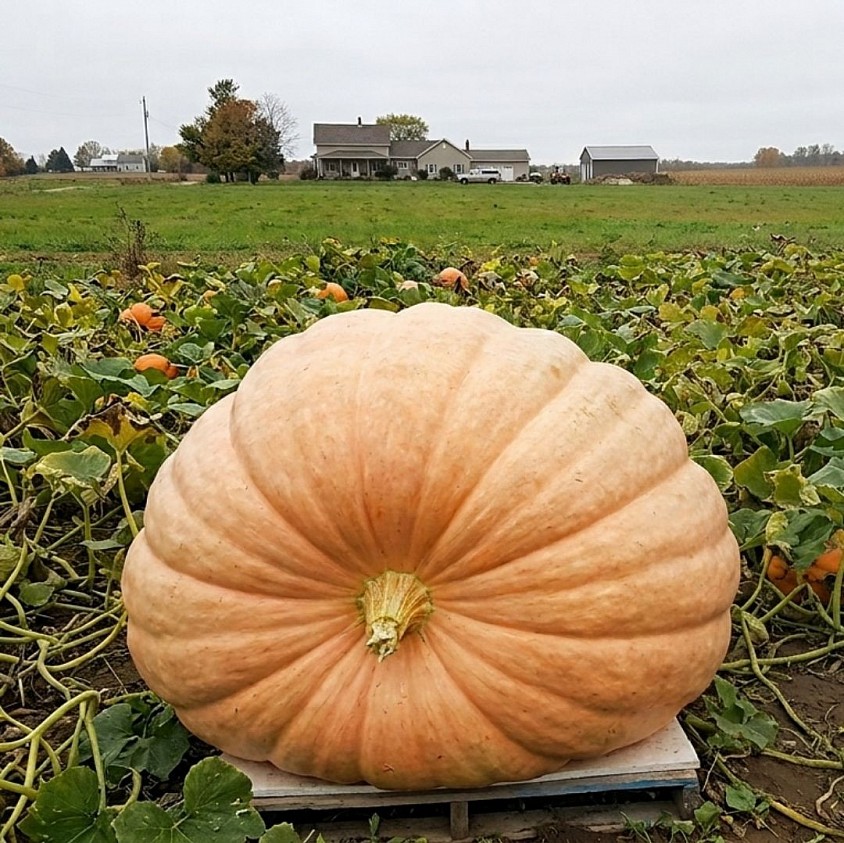
Growing massive, record-breaking giant pumpkins requires precision care, optimal soil biology, and, most importantly, top-tier genetic potential. In the competitive giant pumpkin community, serious growers understand that pedigree dictates potential. Choosing the right Dill’s Atlantic Giant seed is the single most critical decision you make before planting season begins.
Understanding how giant pumpkin genetics work and identifying which lineage offers the greatest chance of success is essential for producing world-class fruit.
🎃 The Legacy of Dill’s Atlantic Giant
Every modern giant pumpkin grown today traces its lineage back to Howard Dill of Windsor, Nova Scotia. Patented in 1979, the Atlantic Giant variety (Cucurbita maxima) changed competitive gardening forever by selectively breeding for rapid cellular expansion and extreme vine vigor. Dill set multiple world records in the early 1980s, establishing the foundation for all modern super-pumpkins.
Today, standard commercial seed packets of Atlantic Giant will reliably produce pumpkins weighing between 300 and 500 pounds under good growing conditions. However, if your goal is to grow a specimen pushing past 1,000 pounds or competing at sanctioned weigh-offs, commercial off-the-shelf seeds are not enough. You need elite, pedigree-tracked lineage bred by top competitive growers.
🎃 What Makes "Elite" Giant Pumpkin Genetics?
In competitive pumpkin growing, seeds are tracked using a strict pedigree system similar to thoroughbred horse racing. Each seed is identified by the fruit's final weight, the grower's last name, the year it was harvested, and its male and female parentage. For example, a seed named "2749 Gienger 2023" indicates a 2,749-pound pumpkin grown by Travis Gienger in 2023.
The best genetic lines display specific performance traits beyond raw weight. Top growers select parent plants based on wall thickness, blossom-end durability, resistance to vine split, aggressive root vigor, and fruit density. The strongest seed genetics consistently produce heavy-weighing offspring across various climates and growing conditions rather than just one fluke fruit.
🎃 The World Record Pedigrees
Seeds sourced directly from official world record holders represent the absolute peak of modern giant pumpkin genetics. Iconic seeds such as the 2749 Gienger (2023 world record) and the proven genetic lines from champions like Ron Wallace, Ian Paton, and Mathias Willemijns carry unmatched performance history. These seeds are prized because their genetic code lacks standard growth-inhibiting enzymes, allowing continuous rapid expansion.
🎃 Heavy-Weighing Crosses ("Heavy Out of the Gate")
Some genetic lines are famous for producing pumpkins that weigh significantly heavier than their visual measurements predict. Experienced growers look for cross-pollinations involving thick-walled strains like the 2009 Wallace, 1725 Harp, or recent 2000+ lb giants. Seeds from these parent pairings consistently pass down thick orange walls and high solid-to-water ratios.
🎃 Proven Mother Plants
A seed's female parent (the plant that actually grew the pumpkin) supplies the main structural traits, while the male parent provides complementary characteristics through controlled hand-pollination. The most sought-after seeds come from self-pollinated champion plants or controlled crosses between two distinct 2,000 lb+ proven lines.
🎃 Commercial Seeds vs. Proven Pedigree Seeds
If you buy a standard packet of Atlantic Giant seeds from a retail rack, you are purchasing open-pollinated seeds with unverified male parentage. These seeds carry great general vigor, making them ideal for garden displays, local patch growing, or learning basic cultivation techniques.
For true competition potential, pedigree seeds obtained directly from giant pumpkin clubs, weigh-off auctions, or dedicated seed distributors are essential. These seeds come with detailed genetic charts showing both mother and father lines, giving you complete clarity on the hereditary potential of your vine.
🎃 How to Choose the Best Seed for Your Patch
Selecting the single best seed depends on your growing environment and experience level.
First, examine regional climate tolerance. Some genetic lines perform exceptionally well in cooler northern climates, while others tolerate hot, humid summers without premature vine collapse.
Second, look for genetic consistency over single-year wonders. A seed lineage that has produced multiple 1,500+ pound pumpkins across different growers' patches often provides more reliable results than a seed from a single huge pumpkin with no proven offspring.
Finally, ensure you acquire seeds stored in cool, dry conditions with clear documentation of their provenance. When elite Atlantic Giant genetics are paired with proper soil preparation, full sunlight, and diligent care, the ceiling for potential weight is practically unlimited.
Understanding Scoville Heat Units (SHU): The Science Behind Chili Pepper Pungency
When exploring the fiery world of chili peppers, you will frequently encounter the term Scoville Heat Units, commonly abbreviated as SHU. This metric serves as the universal standard for measuring the pungency, or heat level, of chili peppers and products infused with capsaicin. Whether you are a culinary enthusiast experimenting with mild flavors or a thrill-seeker chasing the intense burn of super-hot varieties, understanding how SHU works provides valuable insight into what makes certain foods spicy.
🌶️ What Are Scoville Heat Units and Capsaicin?
At the core of every measurement on the Scoville scale is capsaicin, the primary chemical compound responsible for the burning sensation you experience when consuming spicy foods. Capsaicinoids interact directly with the pain receptors located on your tongue and mucous membranes, specifically the TRPV1 receptors, which trick your brain into perceiving a sensation of physical heat. Scoville Heat Units quantify the exact concentration of these active chemical compounds within a given pepper. The higher the SHU rating, the greater the concentration of capsaicin and the more intense the resulting burn.
🌶️ The History and Origin of the Scoville Scale
The measurement system was established in 1912 by an American pharmacist and chemist named Wilbur Scoville. Before his innovation, no standardized method existed to quantify or compare the spiciness of different chili peppers. Scoville developed a subjective sensory evaluation known as the Scoville Organoleptic Test. In this original process, an exact weight of dried pepper extract was dissolved in alcohol and subsequently diluted in sugar water. A trained panel of human taste-testers would then sample the progressively diluted solutions until they could no longer detect any lingering warmth. The dilution factor required to neutralize the heat determined the pepper's score in Scoville Heat Units. For instance, if an extract required 1,000 dilutions before the heat vanished, it was rated at 1,000 SHU.
🌶️ Modern Laboratory Testing: High-Performance Liquid Chromatography
While Wilbur Scoville’s organoleptic test laid the vital foundation for spice grading, human taste panels presented inherent flaws. Human subjective perception varies wildly from person to person, and taste fatigue sets in quickly when testers evaluate extremely hot peppers. In contemporary food science, laboratories have largely replaced human taste tests with High-Performance Liquid Chromatography (HPLC). This precise chemical analysis machine separates, identifies, and quantifies the exact amounts of capsaicinoids present in a pepper sample. The resulting data is measured in parts per million (ppm) and converted mathematically into Scoville Heat Units to honor Wilbur Scoville's original historical scale.
🌶️ Breaking Down the Heat Tiers on the Scale
The Scoville scale spans an immense numerical range, starting at zero and stretching all the way up to sixteen million units. To make these numbers practical, the scale is typically broken down into distinct heat tiers. At the absolute bottom of the scale sit sweet bell peppers, registering a flat 0 SHU because they contain zero capsaicin. Mild peppers like the familiar Jalapeño occupy the 2,500 to 8,000 SHU range, delivering a polite, accessible kick. Moving upward, medium-to-hot varieties like Cayenne and Habanero peppers span anywhere from 30,000 to 350,000 SHU, offering substantial warmth and complex fruit flavors. Finally, modern super-hot cultivars such as the Carolina Reaper exceed 2,000,000 SHU, representing extreme expert-level territory where capsaicin concentration is maximized.
🌶️ Why SHU Only Tells Half the Story
While Scoville Heat Units provide a reliable mathematical benchmark for capsaicin content, they do not paint a complete picture of a pepper's culinary profile. The SHU rating measures chemical concentration, completely ignoring aroma, secondary flavor notes, natural sugars, acidity, and the unique characteristics of the burn profile. Two peppers might share an identical SHU rating, yet one might deliver an instant sharp hit at the front of the mouth while the other creates a slow, creeping warmth in the back of the throat. Nonetheless, understanding Scoville Heat Units remains an essential tool for chefs, gardeners, and food lovers seeking to navigate the diverse and fiery spectrum of chili peppers.